

In this tutorial we will quickly setup a cloud development workspace for Python and the Django web framework inlcuding a PostgreSQL database, a Visual Studio Code web IDE and PGAdmin database admin panel to work with databases convienetly directly if needed on Websson which you can find here:
https://portal.fineupp.com/websson
If you prefer we also have video of the content of this blog post available. The first 3 minutes are about how to register and create a trial, so if you want see that watch from the beginning, otherwise this link starts the video right where the Django setup begins:
In part 2 of this post we will also go over how you can install the Django Rest Framework and install ReactJS and VueJS if this is your preferred architecture pattern. You can of course also install or generally use any frontend framework of your choice.
You will need to head over the Websson home page and if you don’t have a Websson account and free 30 day trial or other subscription yet, you will need to sign-up for an account and create a free trial or subscription.
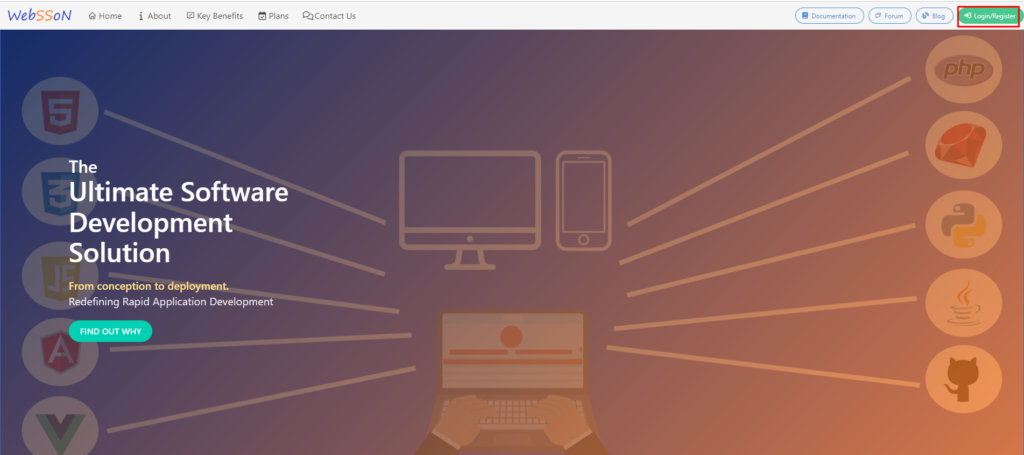
Creating a free trial is easy. Click on the green Login/Register button on the top right corner.
Then click on register:

Pay special attention to entering a short, but meaningful username.
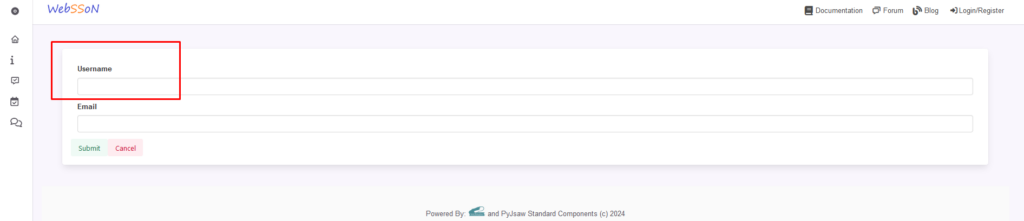
The username will be used to unique identify all of the resource that you will later use and deploy and will also be needed for you to login.
You email will be necessary to for general communication and to confirm that you really want to create this account.
After entering your preferred username and your email you will be asked to check you email and to confirm your account using the link in your email inbox.
After clicking on the link to confirm your email address, you will be redirected back to the Websson account creation page to finish your account creation.
You will be asked to enter your firstname, lastname and a password and confirm your password.
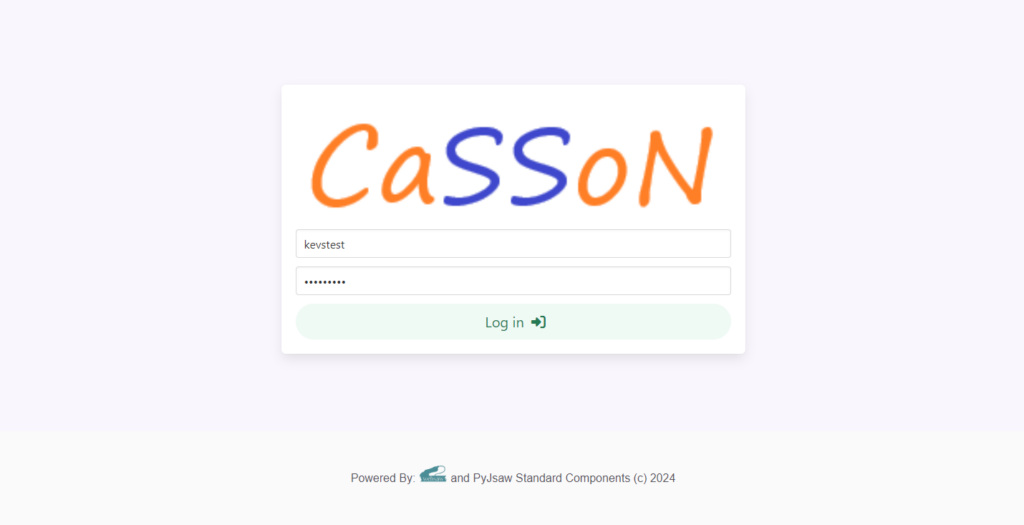
Finally you will be redirected to the login page so you can login with your Websson account.
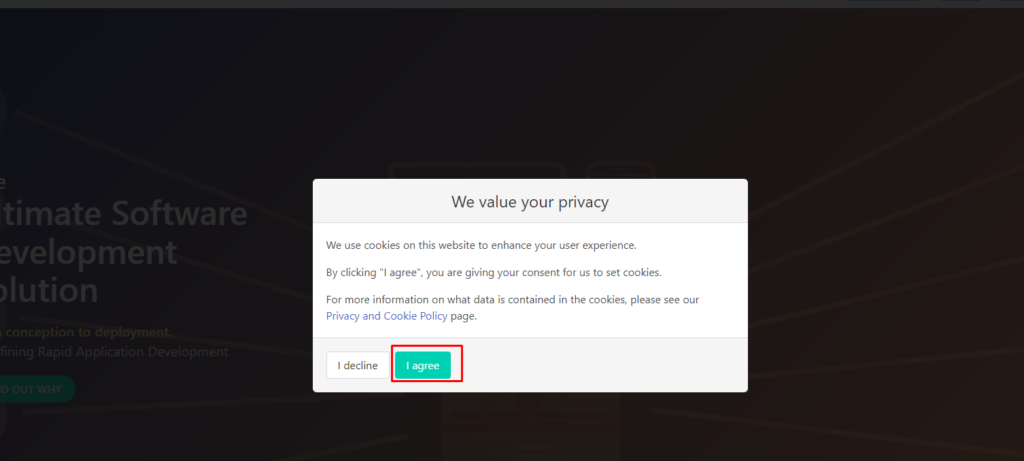
After login, if you have not been asked before, you will be asked to confirm that you agree with Websson’s cookie policy. Please only use the Websson service if you agree with the cookie policy.
After login the web page will not look much different other than that you now have registered as a user and you will see that you are logged in the upper right corner of the screen.
Websson has different user types, regular users, which you become after sign-up and customers.
Regular users can use Websson to collaborate on code with Websson customers, but more on that later.
In order for you to be able to create your own Django cloud development workspace you need to be a customer and a subscription.
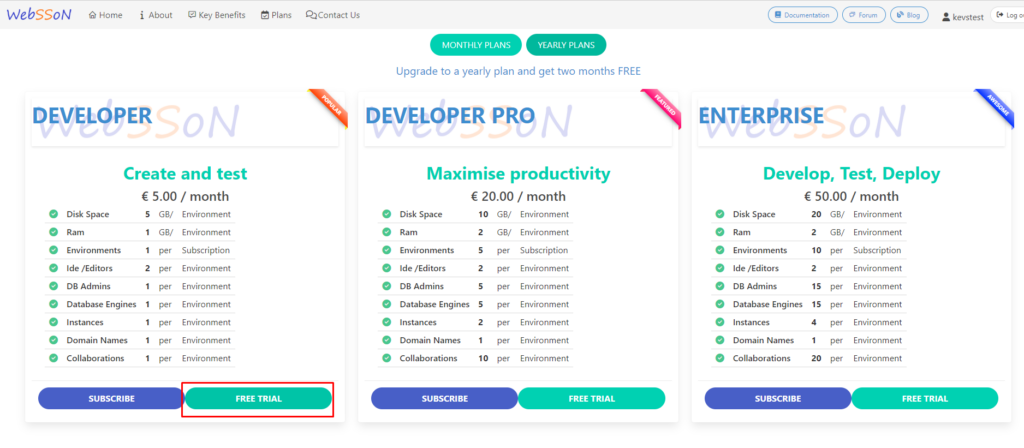
If you don’t have a subscription or free trial already navigate down the page to create a subscription or free trial:
Afterwards confirm your trial or subsription:
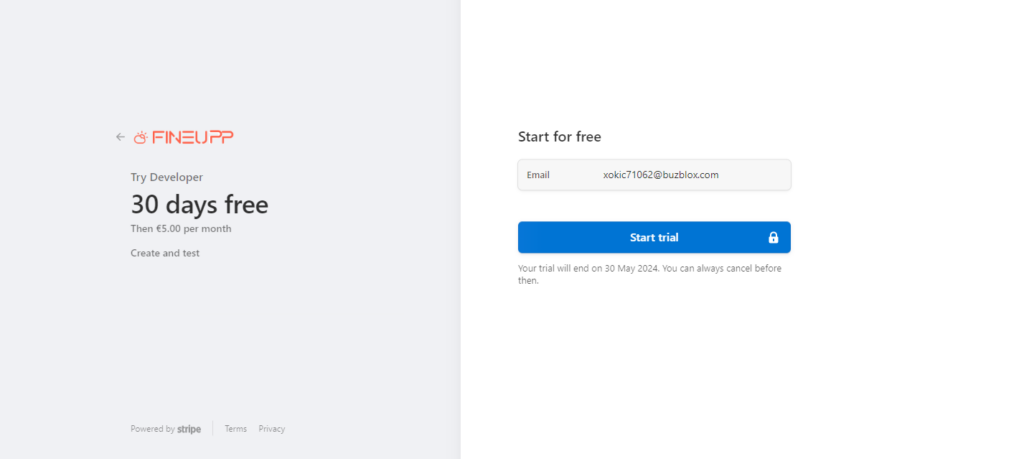
After you click on “Start trial” you will see the blue button will turn into a green button with a checkmark and then redirect you to the Websson portal where you can setup your Django envrionment.
Click on setup for your subscription:
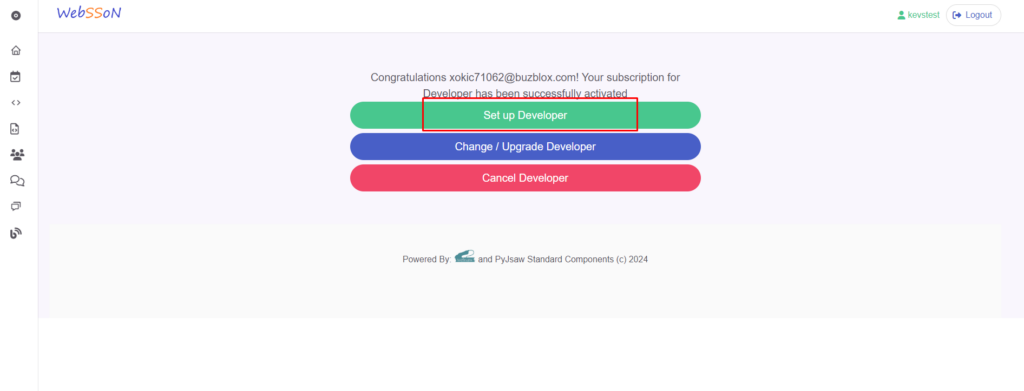
This will redirect you to the main portal where you can create or modify resources in your workspace.
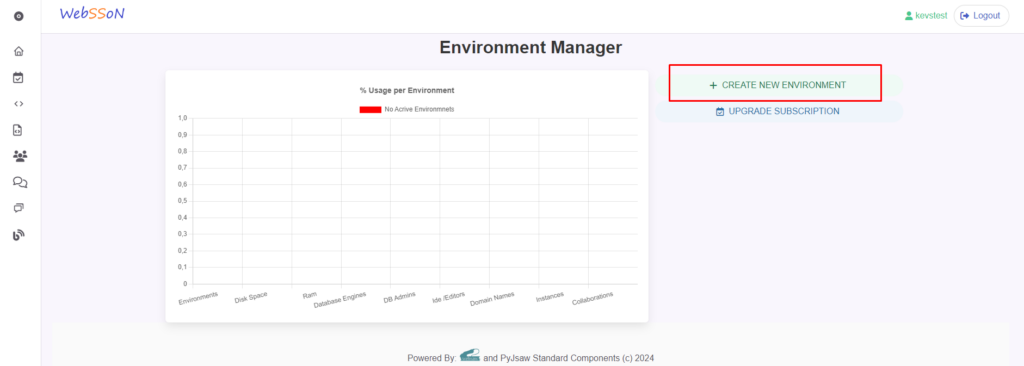
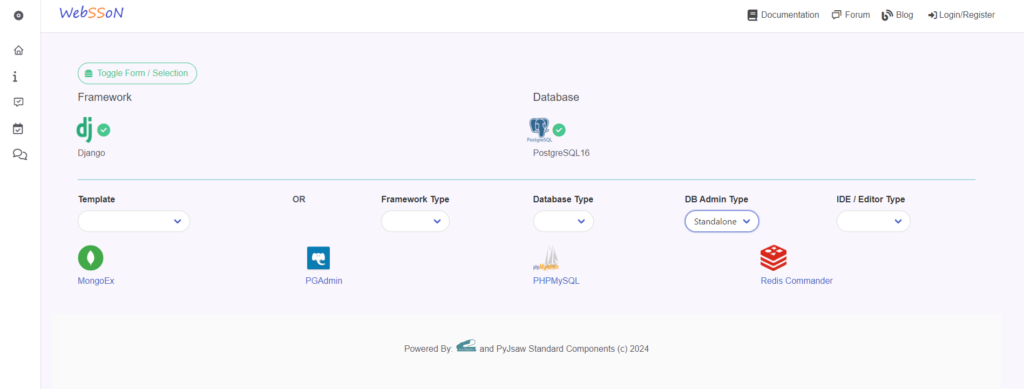
Let’s create a Django environment here:
Then click on the drop down menu for web frameworks and choose the Python type:
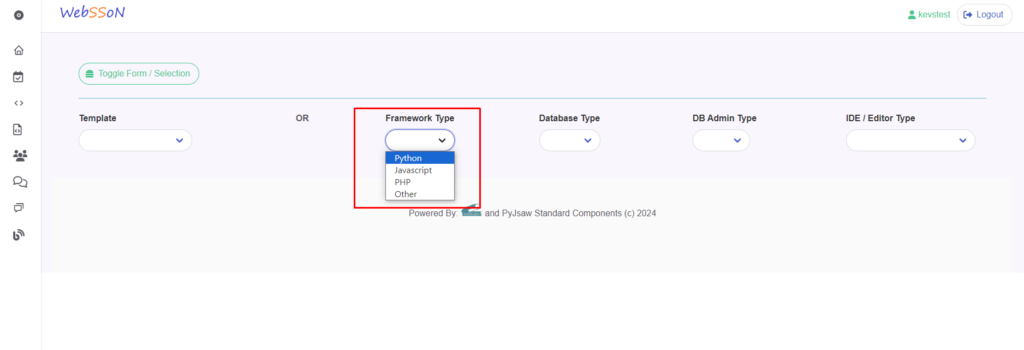
Then pick Django:
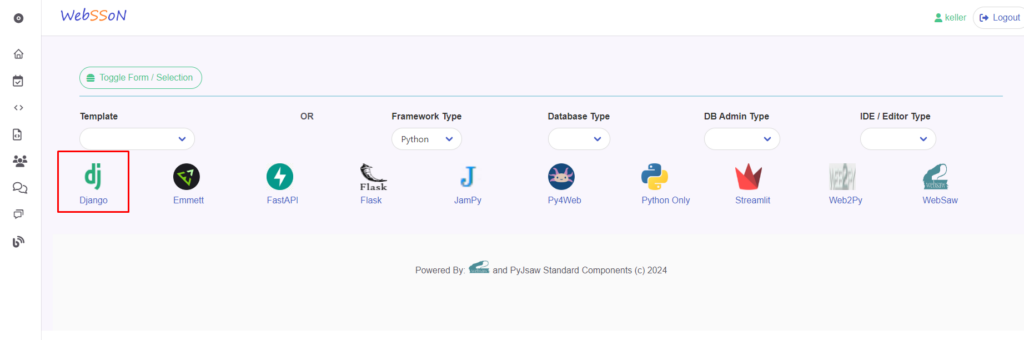
Afterwards pick a SQL database type:
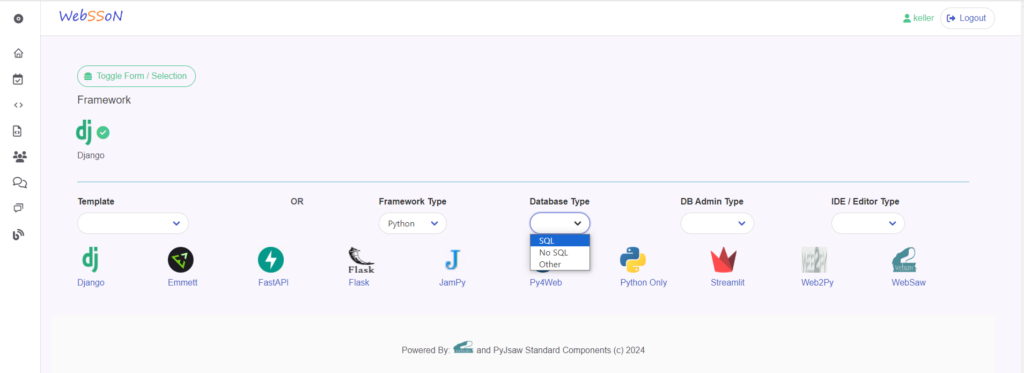
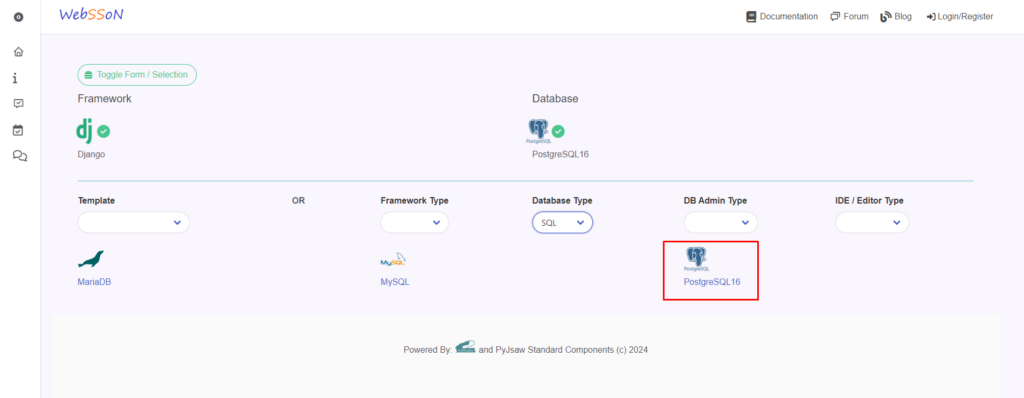
For this example let’s pick the PostgreSQL database type:
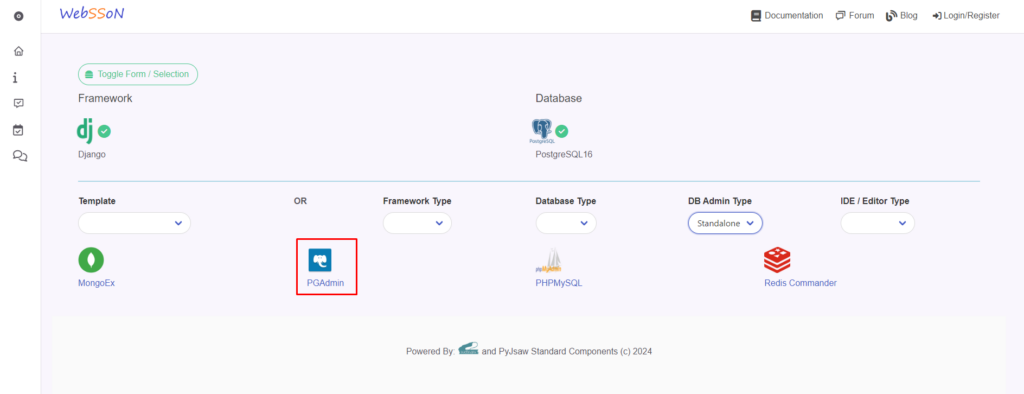
Now let’s pick the database admin panel software for the database. We will pick "Standalone" and then….
..in this case "PGAdmin":
Afterwards we can pick the web integrated development environment we want to use for editing the Django code base.
There are IDEs of the type Standalone and Embedded.
The difference is that the embedded type IDE is as VSCode online instance that will be running inside the same Linux environment as your code side by side. This will enable you to jump into the terminal and install additional Python packages right from VSCode. This is very useful when you are the primary developer and main workspace manager.
The standalone type is a IDE instance that is basically running next to the Linux environment that contains your code. This IDE type will then mount the folders with the all the code. This is great if you want to share your complete codebase for collaboration with a colleague or friend.
If you only want to share a specific folder or Django app from the whole Django project, than that is also possible, if you create an IDE under the menu "Collaboration", but we will get to that later.
In this blog post we want to get started with the embedded type so we can start coding as the main developer right away.
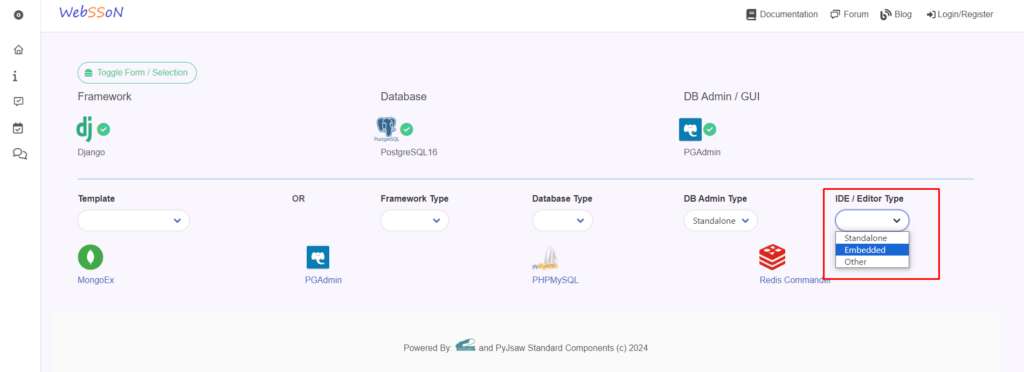
Now pick "VSCode Embedded" :

Now that we completed our choices, lets finalize the deployment.
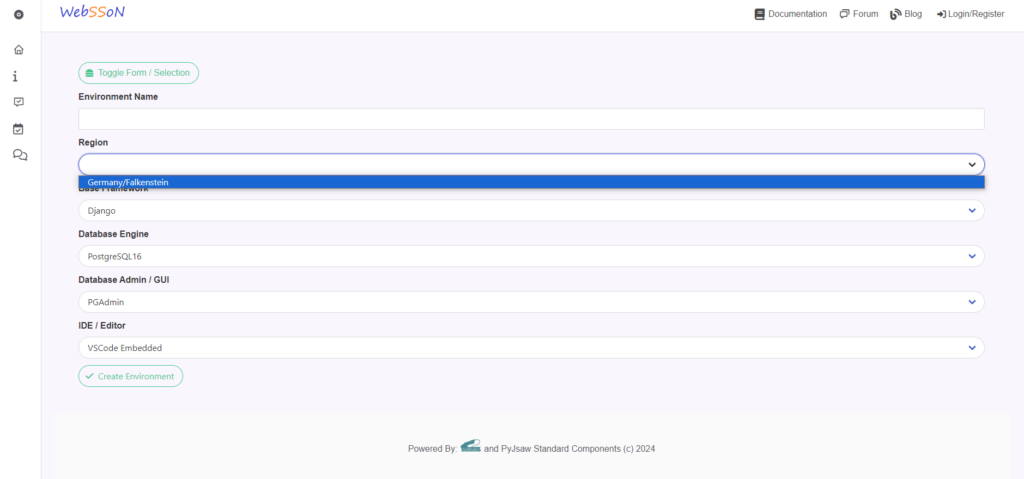
In order to that click on “Toggle Form / Selection” :
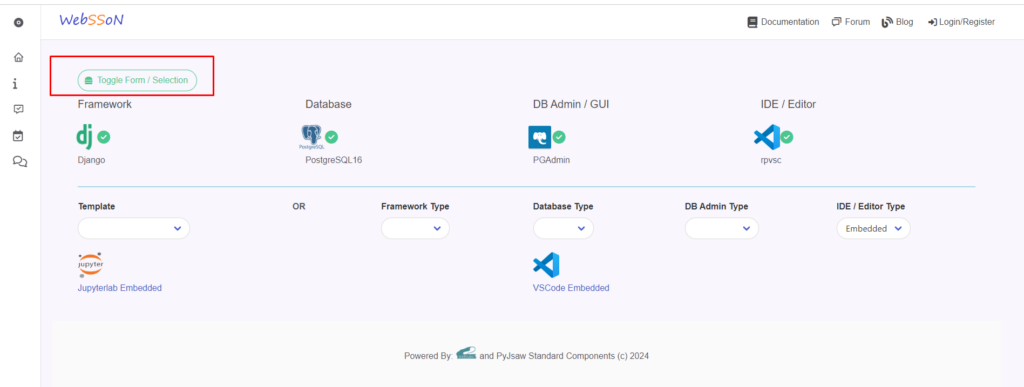
In the form we need to enter the final 2 pieces of information:
- In which physical region do we want to deploy? At the moment of writing Websson only supports Germany so pick that region please:
2. Which name do you want to choose for your Django environment / workspace? Type a short meaningful name.
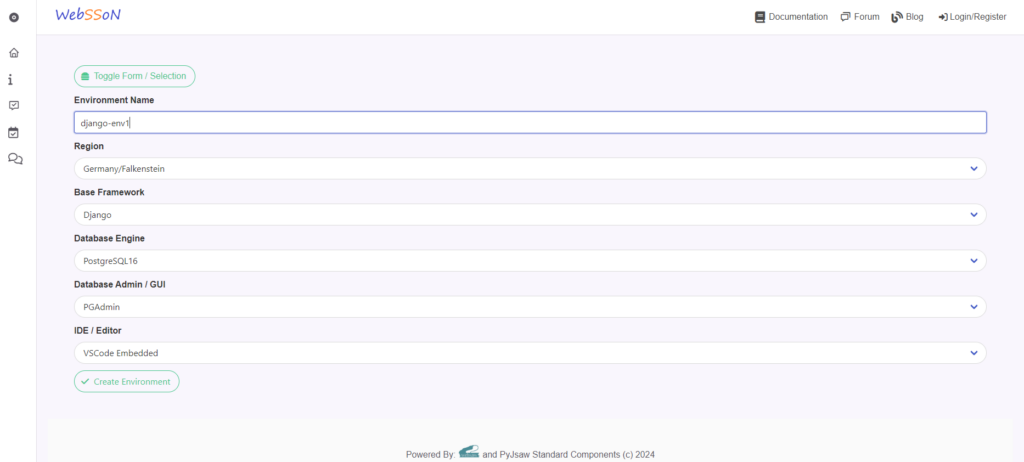
Now click on "Create Environment" :
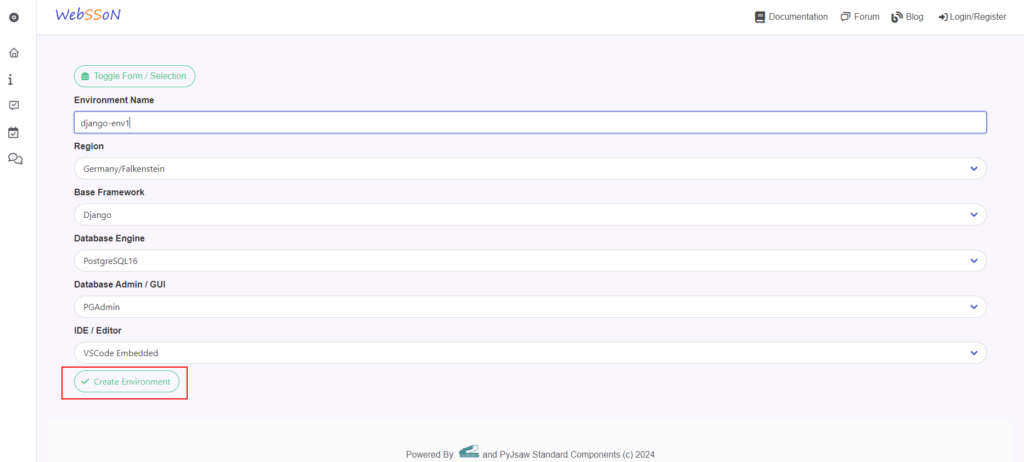
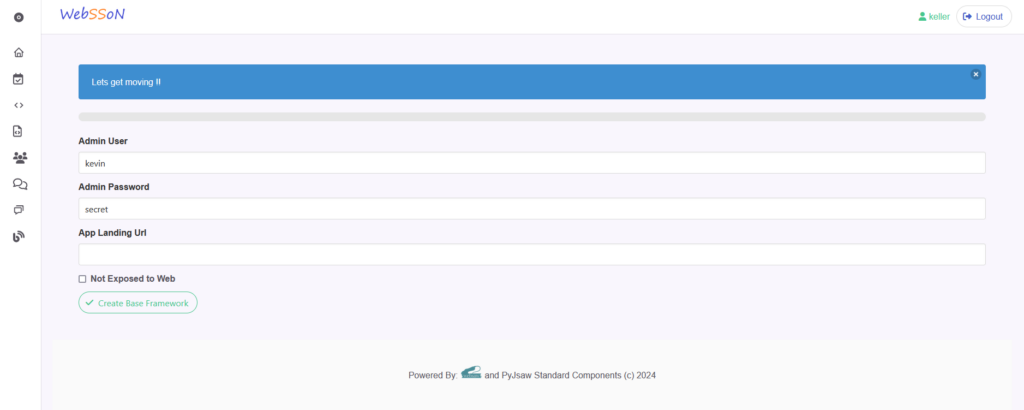
You will now be taken through a wizard for further configuration options for each piece your Django workspace that will be deployed:
Choose a Django admin username and password. Leave the "App Landing Url" page blank and ignore the "Do Not Expose to Web" checkmark for now. Take a note of your username and password somewhere!
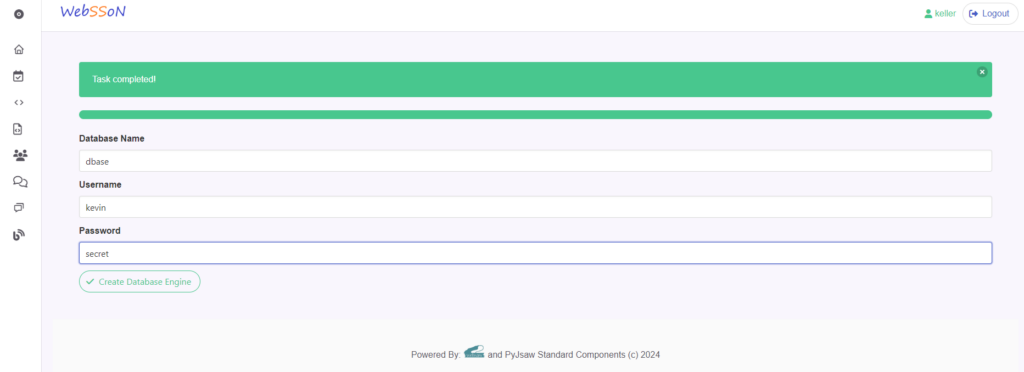
Enter a database name of the database environment. This will also be the database that will be created for you. Please also enter a database user and password of you choosing. Take a note of your username and password somewhere!
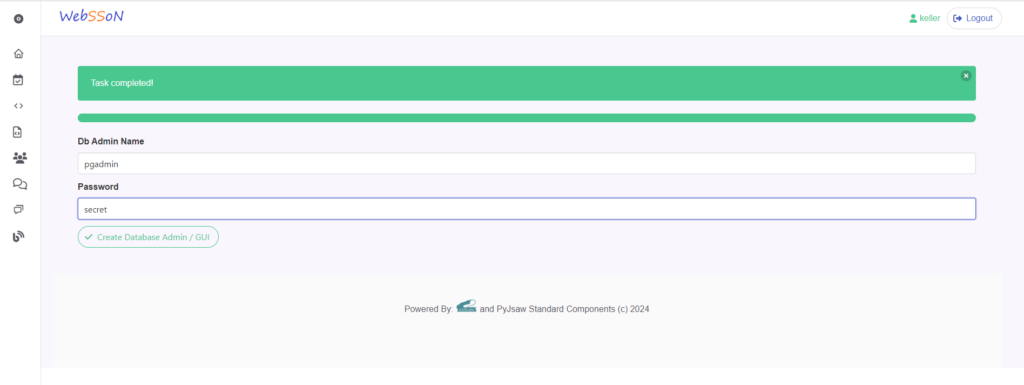
Next enter a short meaningful name for the PGAdmin environment. Your username will be your email address you entered when you created the Websson account. Please also enter a password here. Take a note of the password somehwhere!
Next enter a short meaningful name for your embedded VSCode IDE:
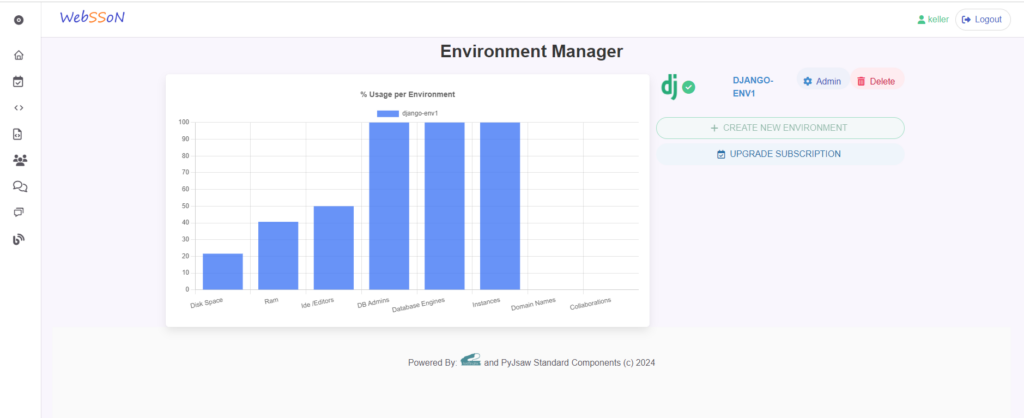
Thats it! Now you should be redirected to the main menu where you will find the links to all the environments you created for you worspace, such as the link to the Django web interface and the IDE.
Click on the Django logo or the environment name. A new browser tab will take you to the web interface of your Django installation. If you add /admin in the browser url you can get to the Django admin interface. Here you can login using the username and password you have chosen earlier.

Once you checked that out, come back the Websson menu and click on "Admin" please.

In the admin menu you can now see a lot of features that Websson provides to make developing in the Cloud easy, but we will get to each feature later.
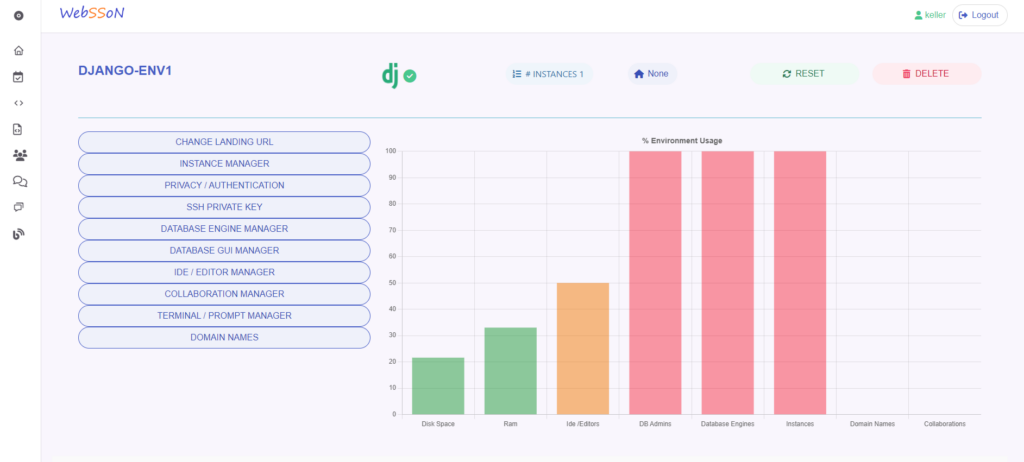
You can also of course see what features of your subscription you have used up.
In order to use the VSCode web ide go to the IDE / Editor menu item:
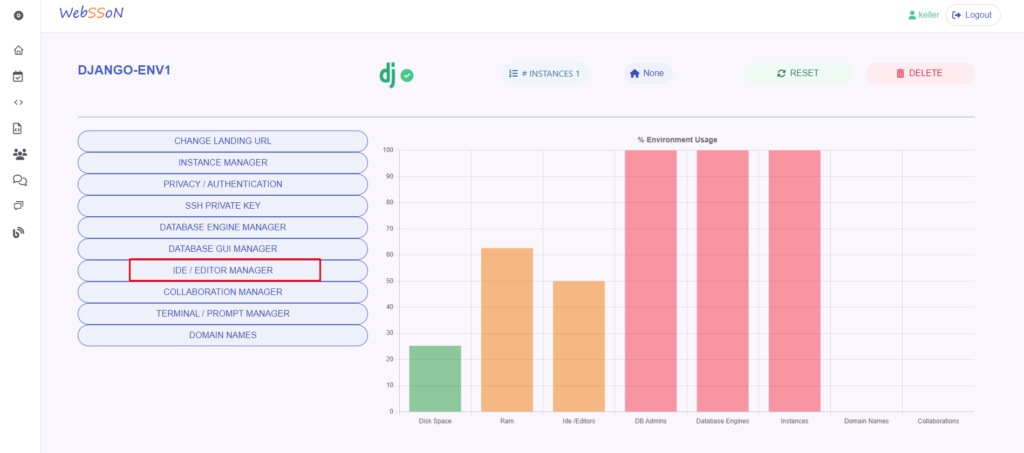
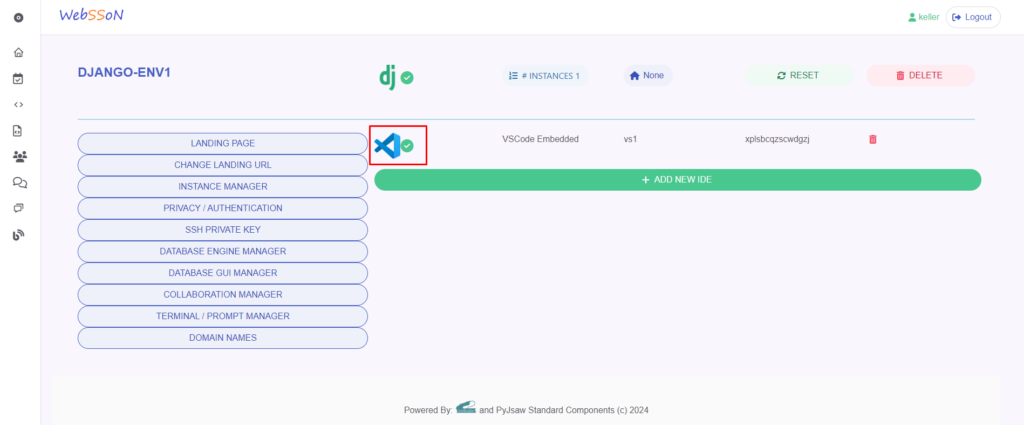
Here you can click on the VSCode icon which will redirect you to your VSCode Django coding workspace.
Don’t worry, the link is secured with a unique token which is used in the link. The token can also be viewed in the menu:
Now you can see your VSCode web environment loading and pick a color theme.
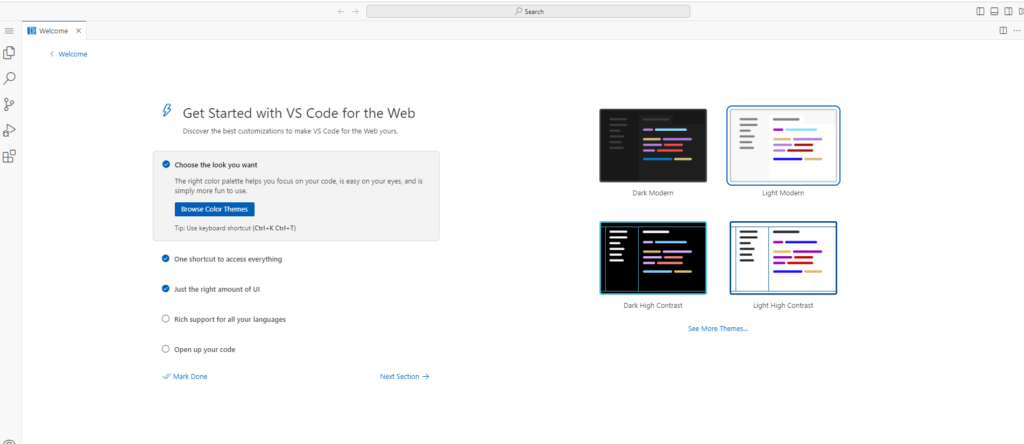
I prefer black so I will use that in the screenshots going forward.
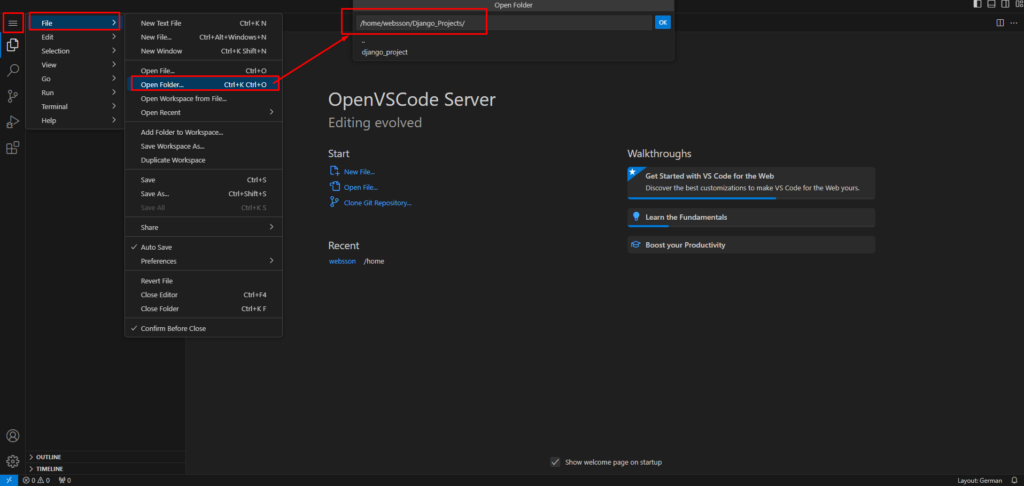
In order to edit Django code click on the upper left corner, the “File” menu and click on “Open Folder” then open the folder path “/home/websson/Django_Projects” :
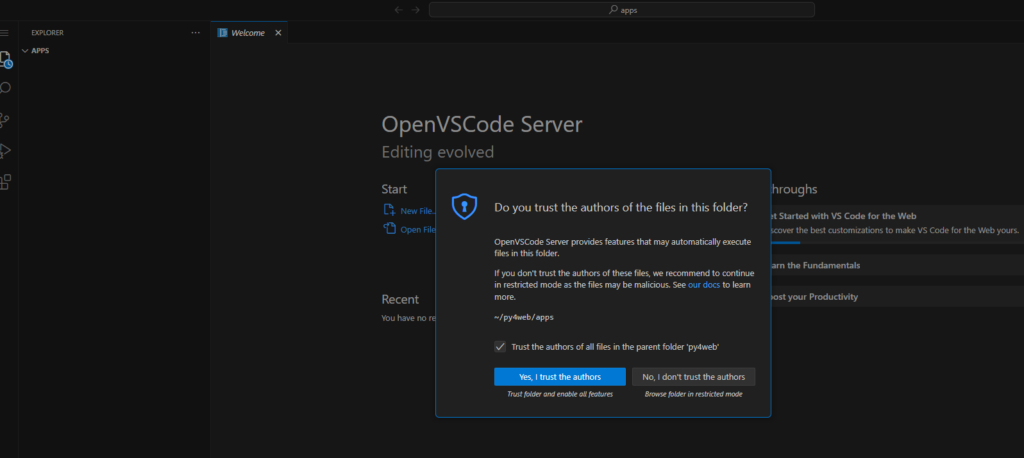
VSCode will ask you if you trust the code authors, please click on “I trust them” and set the appropiate checkmark:
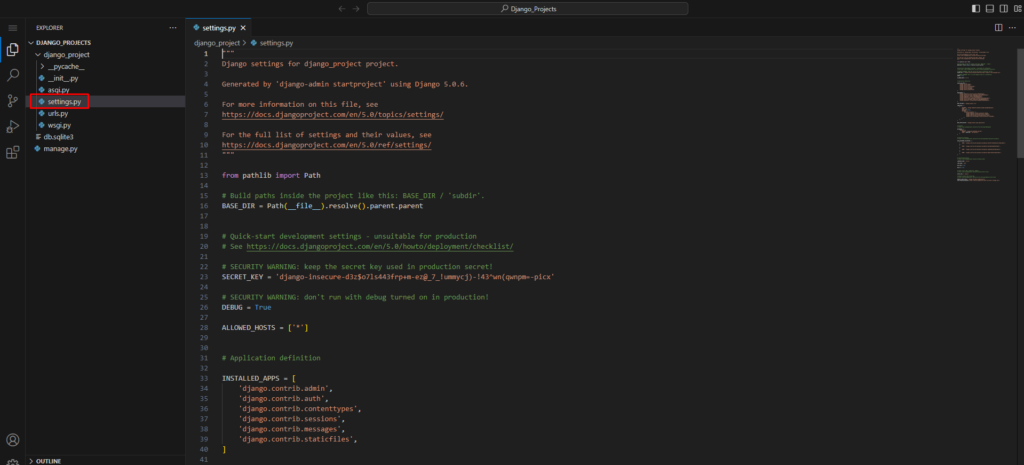
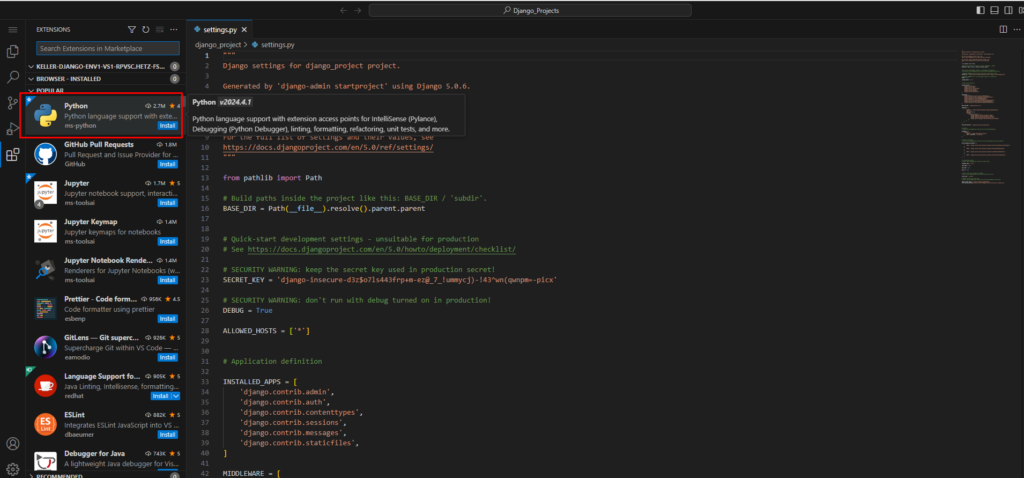
Now you will see the file paths and files that you can edit on the left hand side. Open the file "settings.py" .
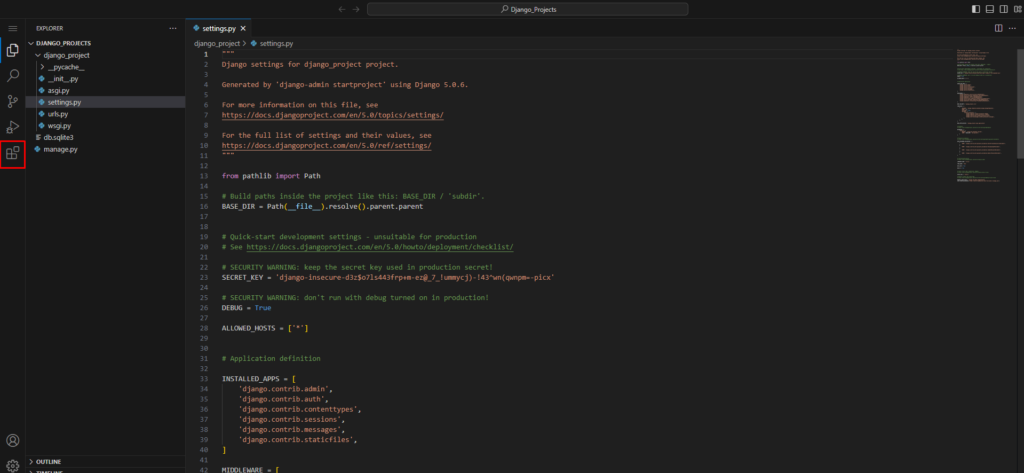
Before we go any further with editing files, let’s install 2 extensions that will help us code. One is the Python extension and the other is the Django extension. For that navigate to the extensions menu on the left:
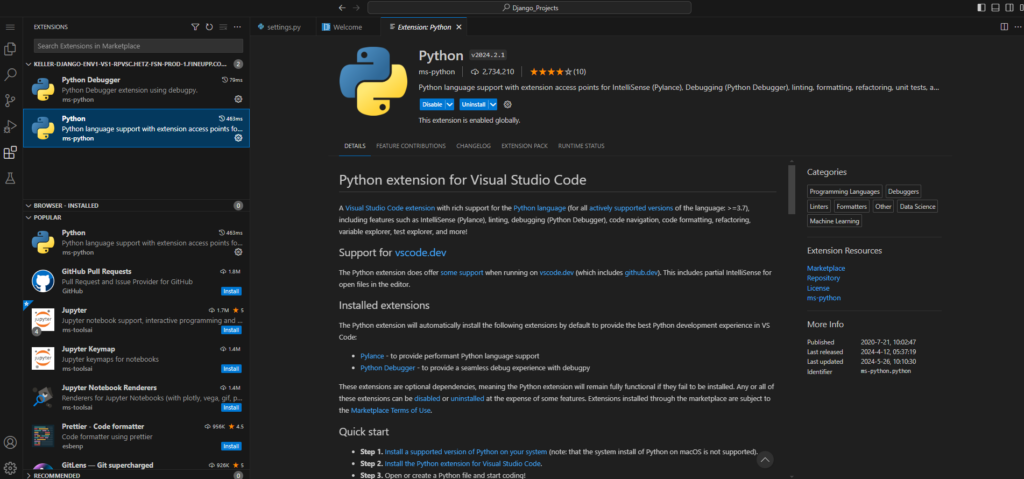
Now add the Python extension. It should show up automatically. If it does not, just seach for "Python".
Once it’s installed you should be able to see the Python and Python Debugger extension intalled in the extensions list:
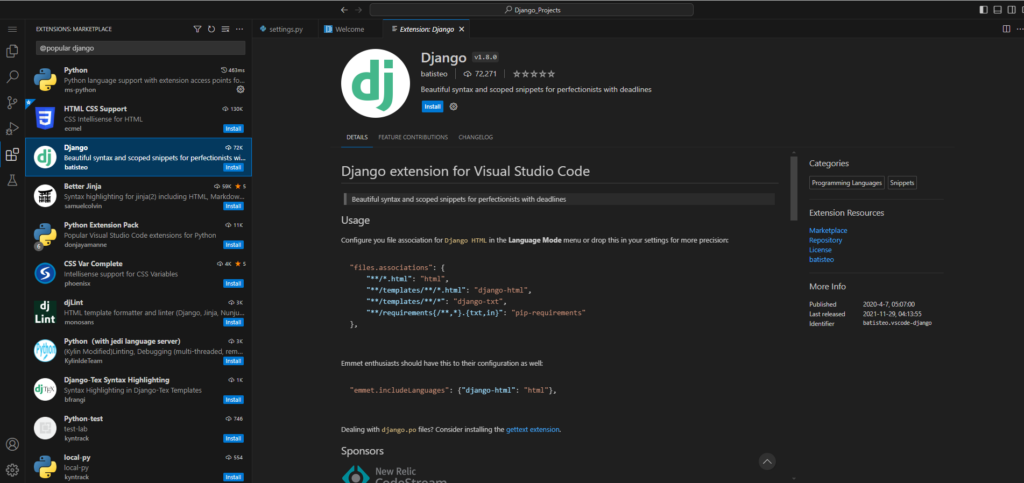
Once you are done with this you may want to optionally also install the Django VSCode extension:
Next we we will familiarize ourselves using the terminal in order to create a Django app, run database migrations and install Python packages using PIP.
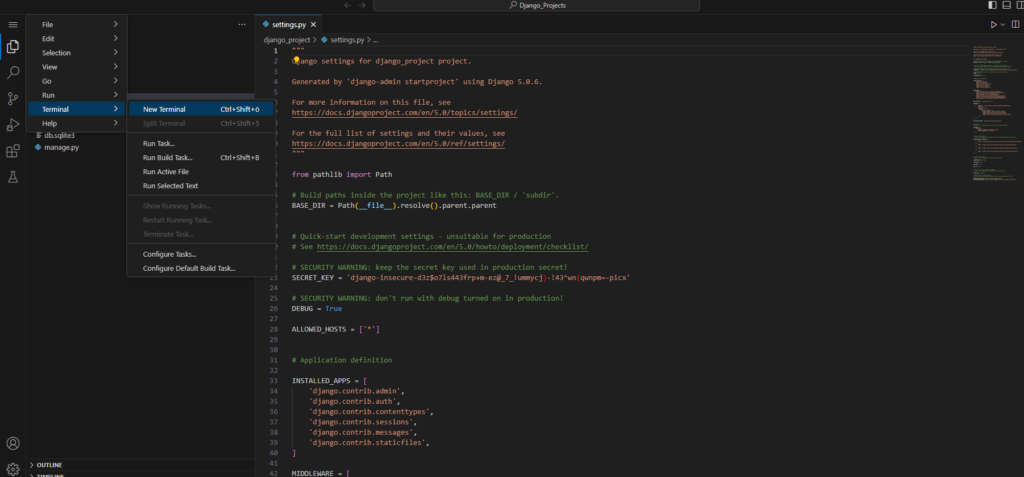
Once in the terminal activate the Python virtual environment that comes pre-installed with your Django Websson workspace, by running the command:
"source ../default_py_env/bin/activate"
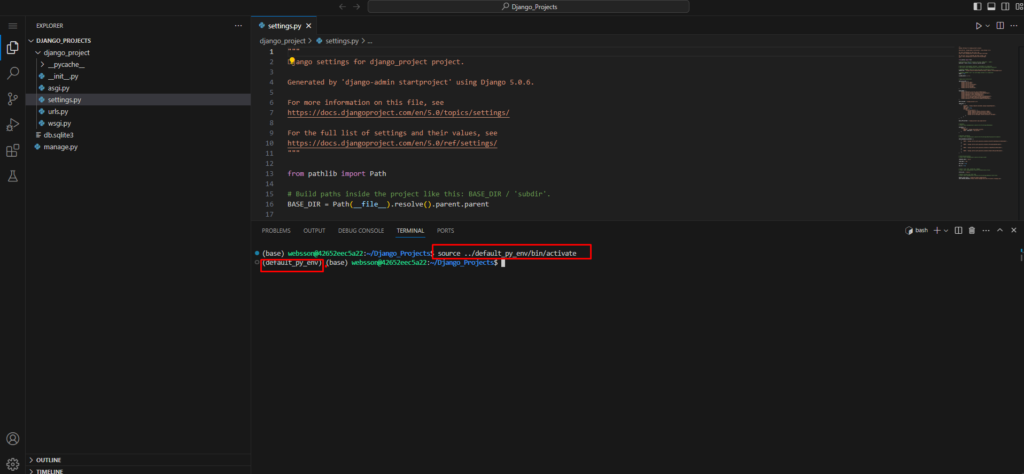
Now you can see in the bash prompt that the virtual environment is indeed activated. You may also happen to see that there is also another Python environment activate called "base".
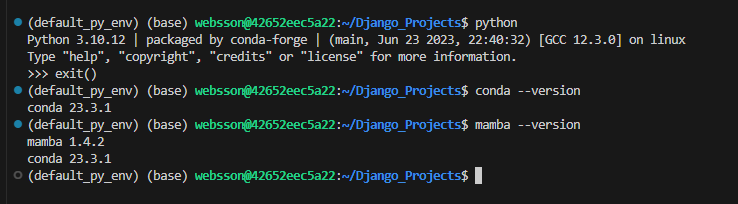
This is because Websson workspaces use Mamba, a drop-in open source Conda alternative with the open source repository of Condaforge activated. So if you are familiar with Conda you should feel right at home. With Conda and Condaforge you can install different Python versions or other virtual environments with ease.
The Conda command as an alias to the Mamba command is available. If you look at the Websson standard “base” environment you can see that Python 3.10.12 at the time of writing is used. But you can install different Python versions and activate them as you see fit giving you a lot of flexibility. For now we will use the defaults however.
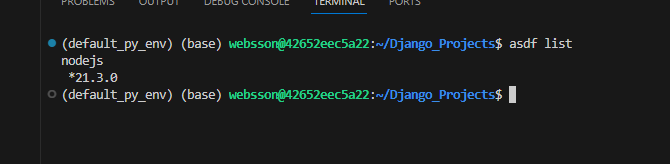
In addition you can install additional programming languages and frameworks such as Node.JS or React or Vue.JS into the same workspace using the ASDF package manager which is available in your Websson workspace as well. To see what is currently installed issue the “asdf list” command. As you can see Node.JS is already installed.
Documentation on how to use Mamba / Conda or ASDF can be found in the respective links.
Now let us properly setup our Django workspace. We will first stop the Django instance that has been started per default when the Django Websson environment was started by simply killing all Python processes and restart Django from the terminal. Then we will check the Django launch command that will get us Django up and running again.

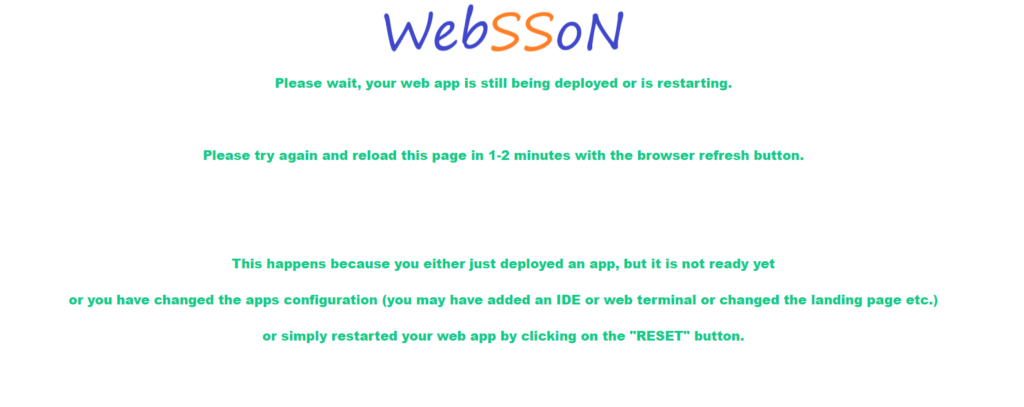
After you have killed all Python instances you will see a screen like this under your Django environment instead of the Django welcome screen:
The launch commands for different frameworks can also be easily found in the path
"/home/websson/launchers"
and in the case of Django it is
"/home/websson/launchers/django/start_django.sh" .
So in oder to restart Django after killing it using "killall python" we can simply run
"python manage.py runserver 0.0.0.0:80" from the path
"/home/websson/Django_Projects" .
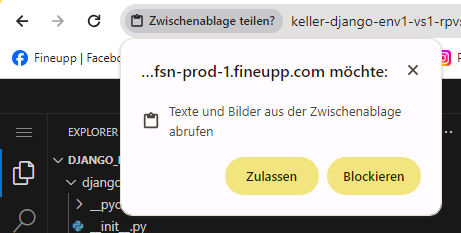
If you have copying and pasting this command into the terminal you may be asked to confirm that pasting is allowed, so I woud recommend to confirm that it is:
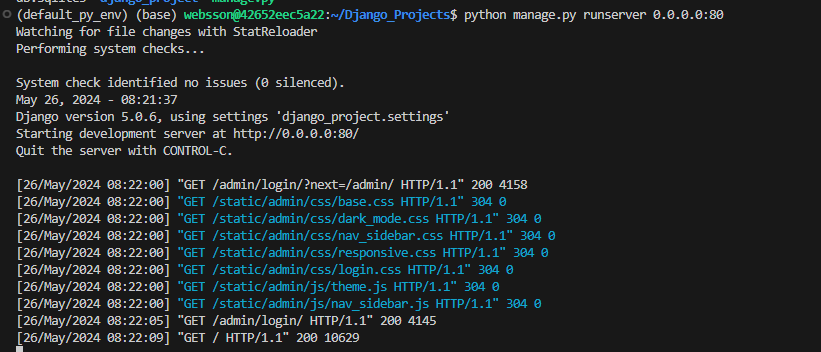
Once you start Django in the terminal you should see a terminal output such as this:
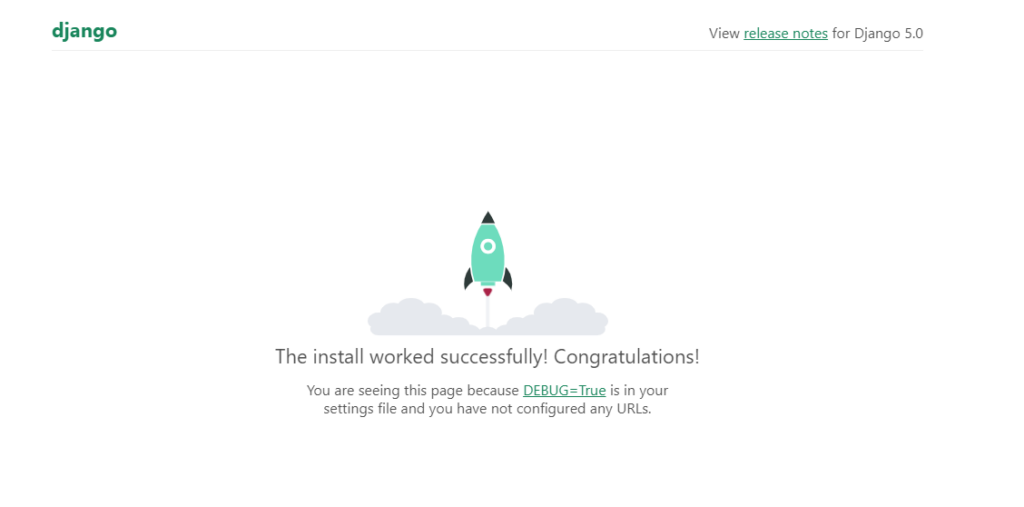
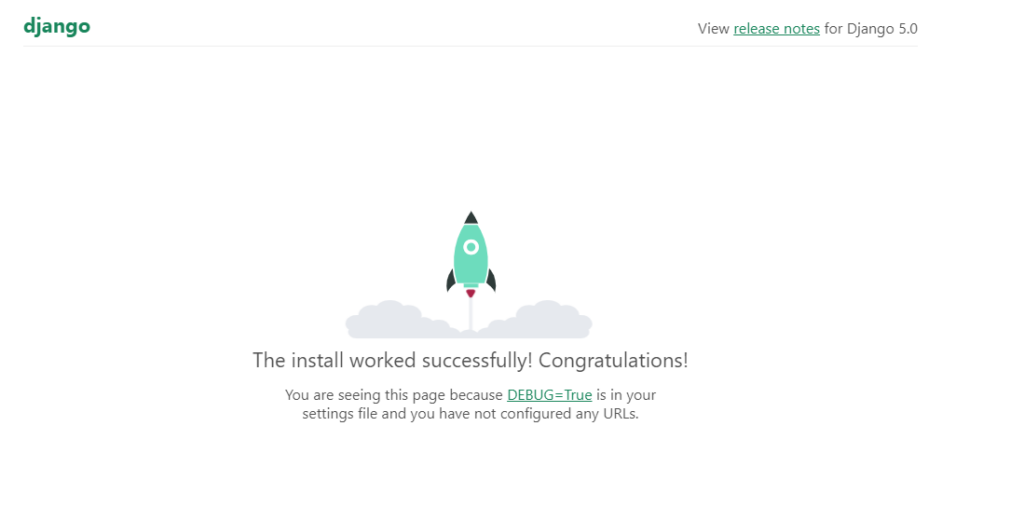
With the logs and output showing there when visit your Django workspace URL again which now should look like this again:
Now back in the terminal let us install some Python packages we need such as “wheel” and the PostgreSQL driver. We should also update PIP. Hence here the commands we need to run:
pip list
pip install --upgrade pip
pip install wheel
pip install psycopg2-binary

Now we will create a sample Django app in our Django project directory by running:
python manage.py startapp testwebsson

We will now connect the PostgreSQL database we deployed earlier to the PGAdmin instance we have available as well as to Django so we can take full advantage of the PostgreSQL Websson provides.
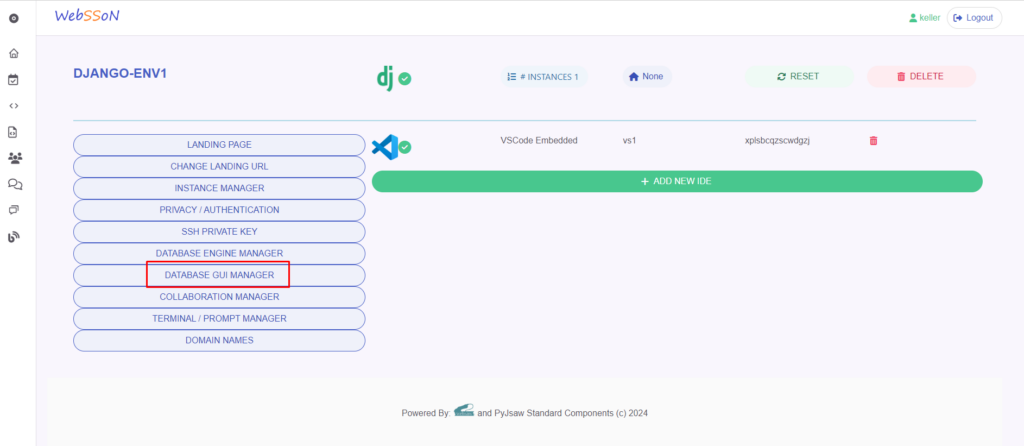
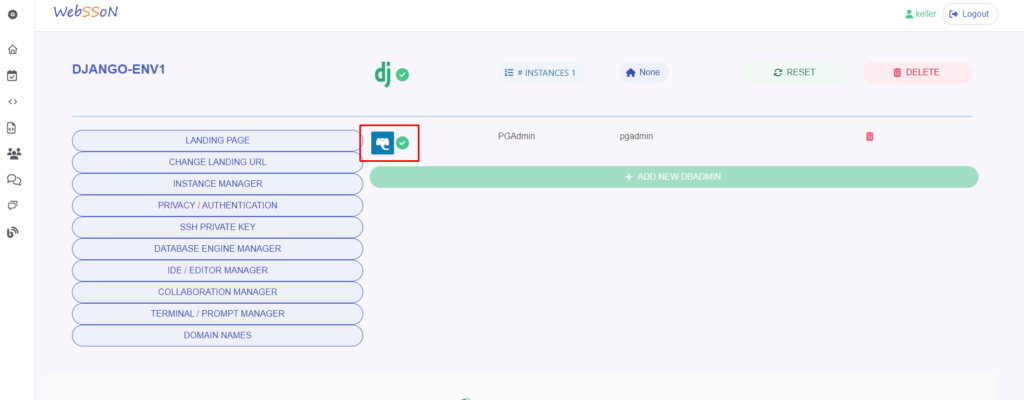
Navigate back to the Websson menu and click on "Datatabase GUI Manager"
Now click on the PGAdmin logo to open up PGAdmin:
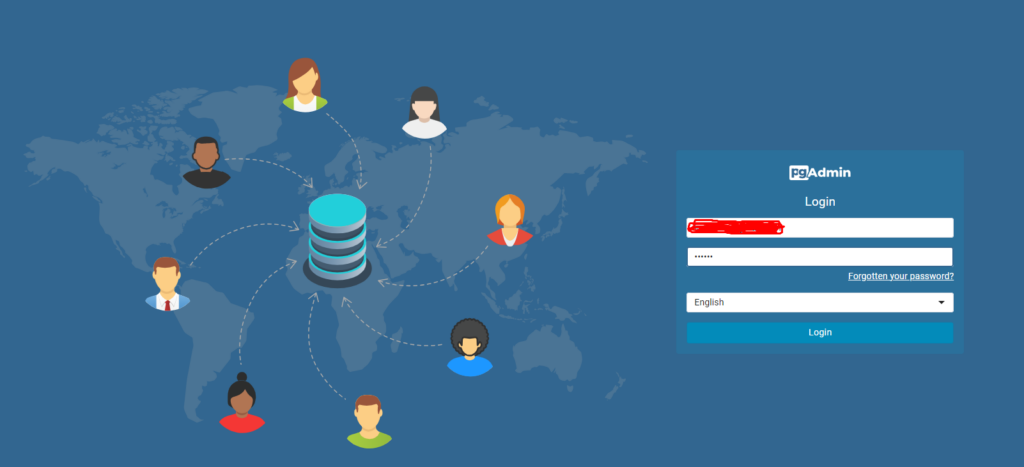
Please login into your PGAdmin instance with the email you used to register with Websson and the password you have chosen for PGAdmin during deployment:
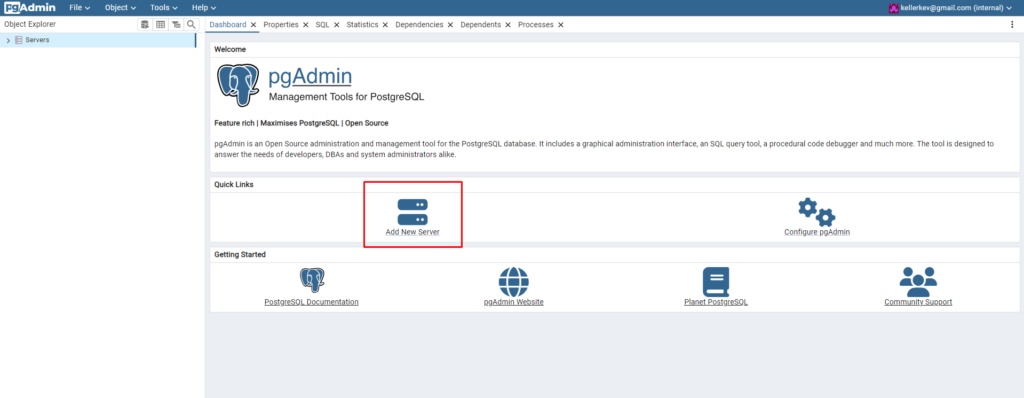
Once logged in click on “Add New Server” to connect to the PostgreSQL that you deployed earlier:
Add a name of your choosing for the PostgreSQL connection:
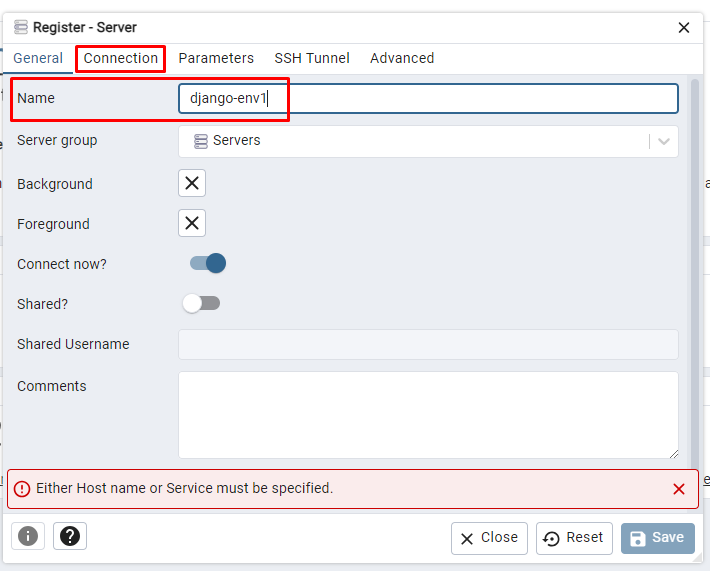
Then click on the “Connection” tab in order to setup the other parameters. Enter the username you used for the database and the password you have set during the deployment configuration. Check the "Save Password?" checkmark.
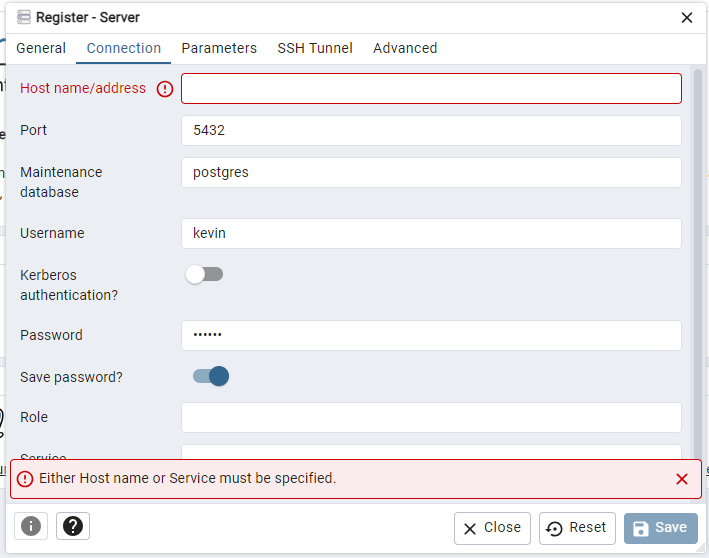
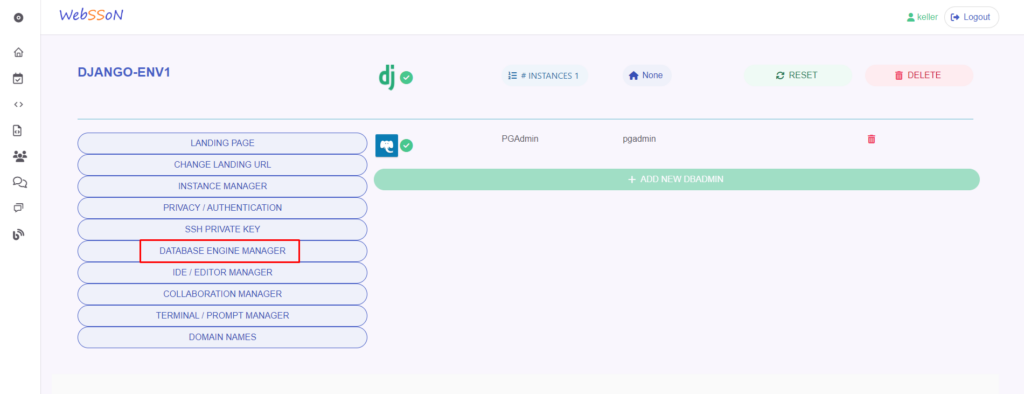
The only thing you are missing the the connection URL string now. For that navigate back to the Websson menu and click on the "Database Engine Manager" menu item:
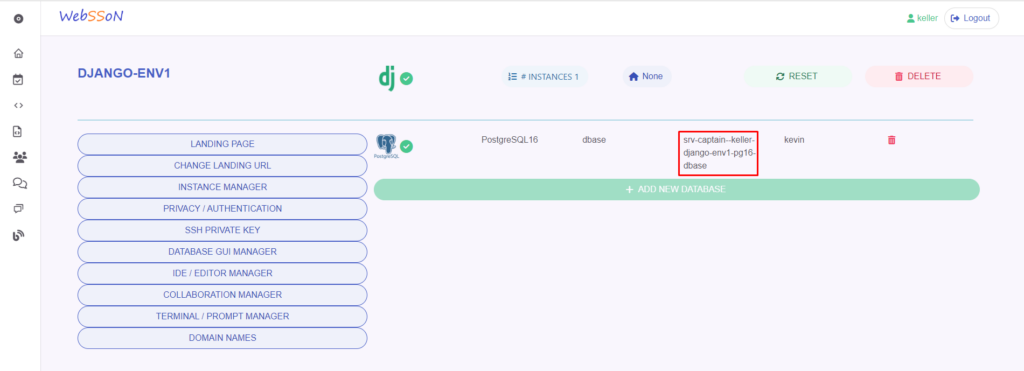
Here you can see the connection string to your database. Copy this string so you can paste it into the PostgreSQL connection string field in PGAdmin:
You should paste this connection URL string in the Host name / address field in PGAdmin now and click on save:
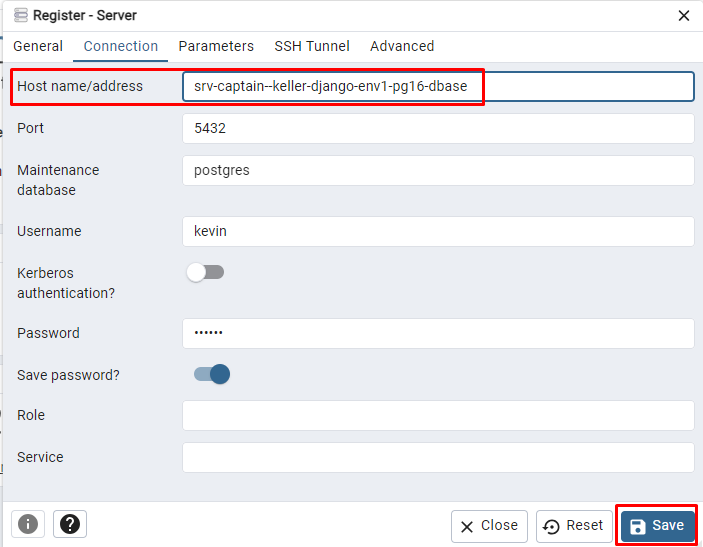
You should now be succefully connected to your PostgreSQL database.
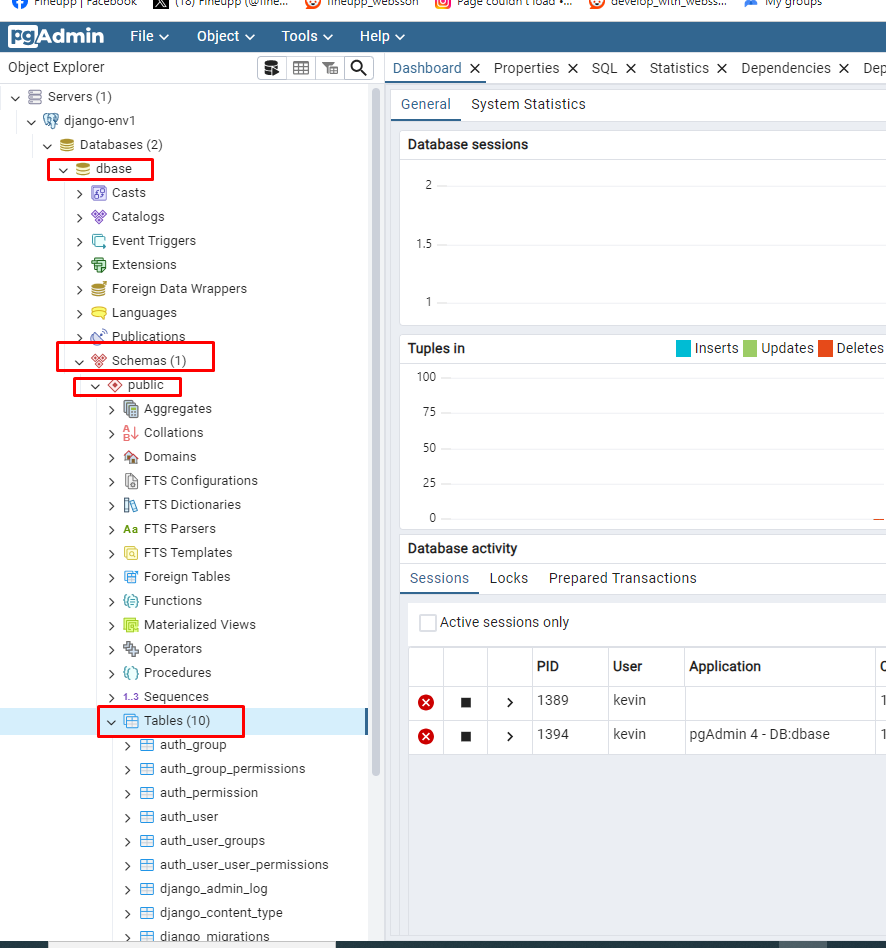
You can navigate to “databases” and then to “dbase” which is the database we had Websson creat as default. From there you can go to “schemas” and then “public” and “tables” to see your tables.

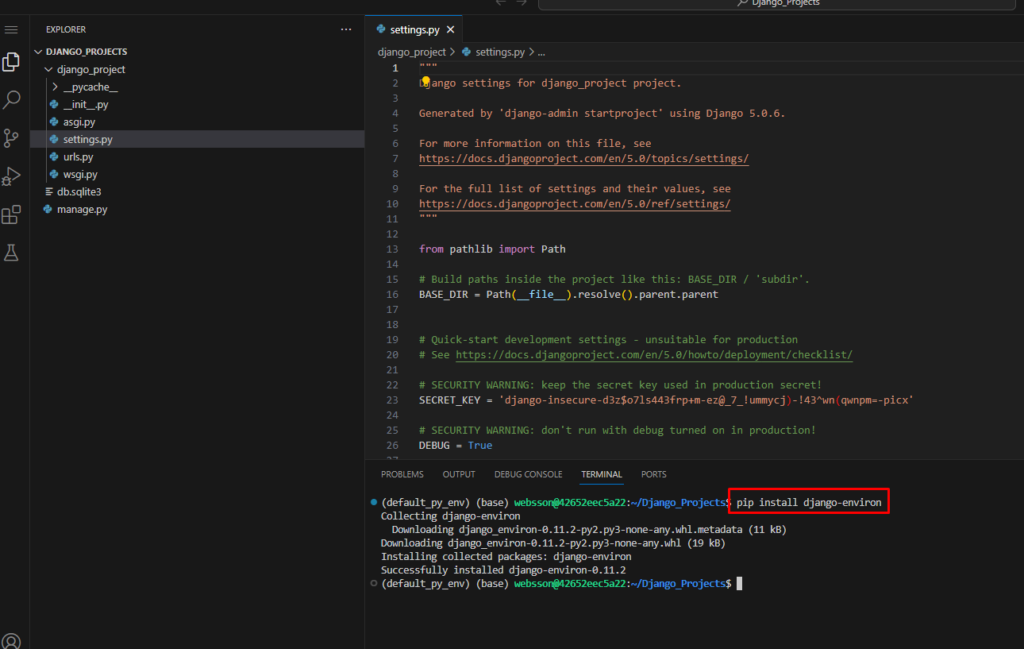
We shoud also connect our Django project and app to this PostgreSQL database. In order to later be able to git push our code to a Git repository, which should put all database and Django secrets into a separate .env file and exclude that file from Git. We do that by installing the Django-Environ package first via PIP in the terminal again:
pip install django-environ
In the VSCode IDE we should now create a “.env” file in the path “/home/websson/Django_Projects” with the following contents. The DB_HOST URL is the same you copy & pasted earlier from the Websson “DATABASE ENGINE MANAGER” menu item and you should copy the SECRET_KEY value from the Django settings.py file.
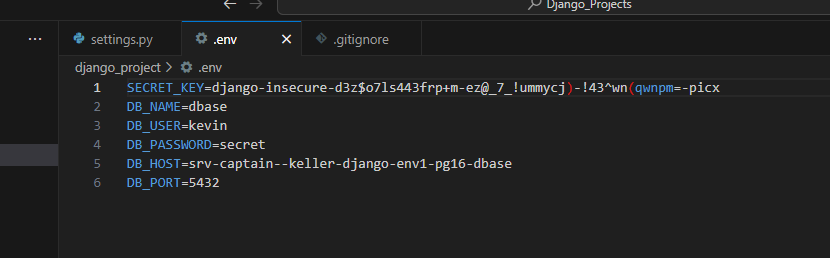
SECRET_KEY=XXX
DB_NAME=dbase
DB_USER=kevin
DB_PASSWORD=secret
DB_HOST=srv-captain--XXXX
DB_PORT=5432
The SECRET_KEY should be XXX for now as we will replace it with your key in a moment. Please paste the DB_HOST value from the Websson “DATABASE ENGINES MANAGER” menu point.
Now in your Django settings.py file you should add the Django-Environ imports and SECRET_KEY:
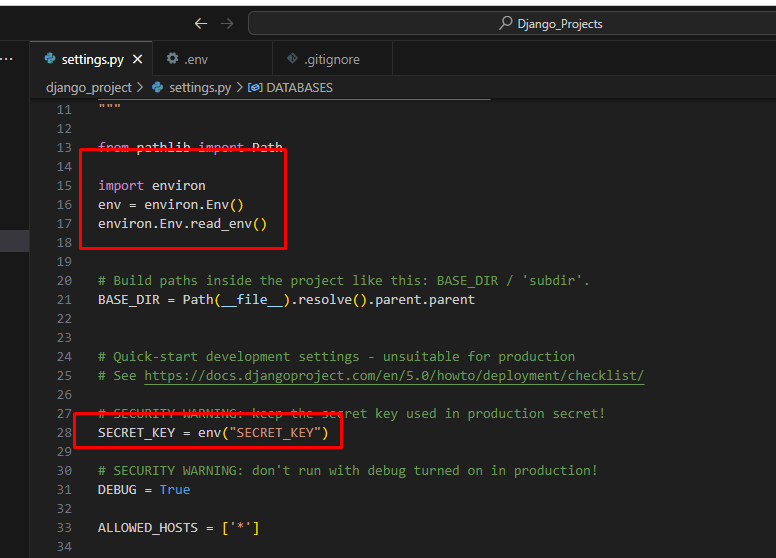
import environ
env = environ.Env()
environ.Env.read_env()
...
...
SECRET_KEY = env("SECRET_KEY")
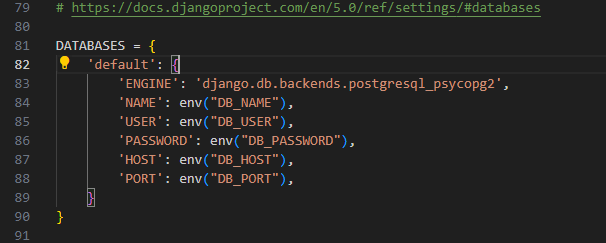
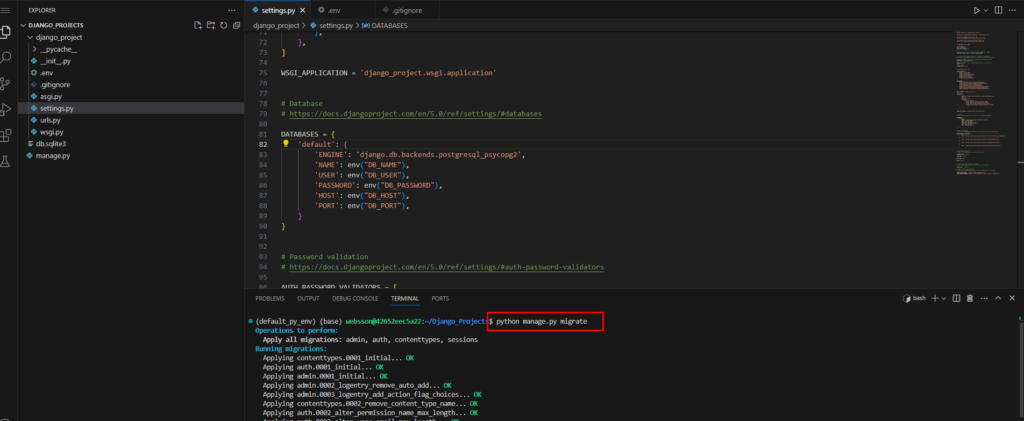
Furthermore replace the previous SQLITE3 configuration in the settings file as follows:
We will start the initial database migration now to setup the core Django tables for the project by running the following in the terminal:
python manage.py migrate
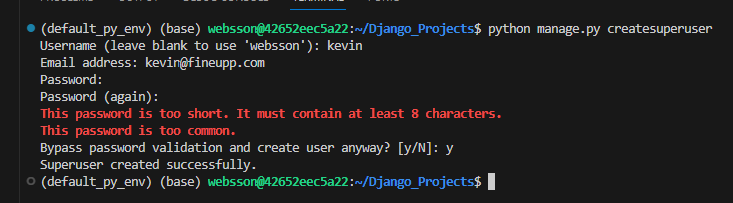
While there was a Django superuser and password created when the Django Websson workspace intially deployed, it was created in the SQLITE3 database shipped during the intial deployment. Since we have connected to the PostgreSQL now, we need to create the superuser user and password again by entering:
python manage.py createsuperuser
You can now enter a super user “username” and “password” again.
We should also add a sample table to the “testwebsson” app in the models file and migrate that.
In order to do that we need to open the models.py file in the “testwebsson” app and add the sample model:
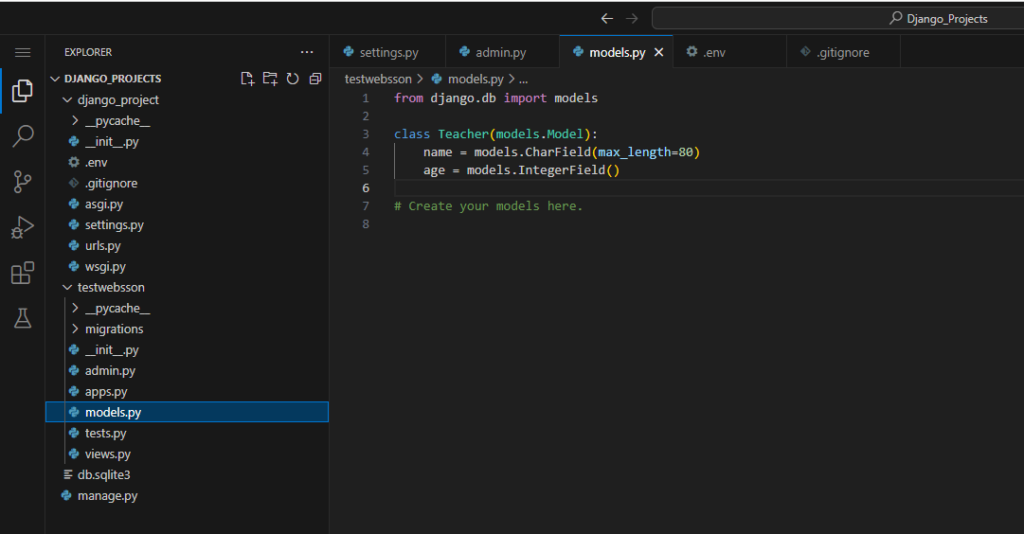
from django.db import models
class Teacher(models.Model):
    name = models.CharField(max_length=80)
    age = models.IntegerField()
Now we will prepare the Django migration file, migrate the model, register our testwebsson app to the project and finally check with PGAdmin if everything looks ok:
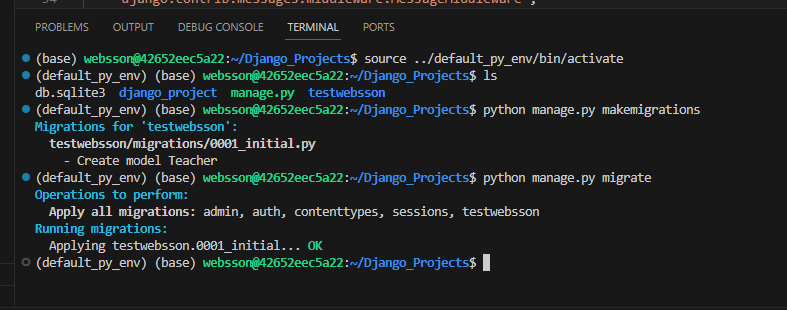
In the settings.py of the Django project add the “testwebsson” app to the installed apps list and then run..
python manage.py makemigrations
python manage.py migrate
.. in the terminal.
We will now check with PGAdmin if all tables have been created as expected. First we see the Django default tables:
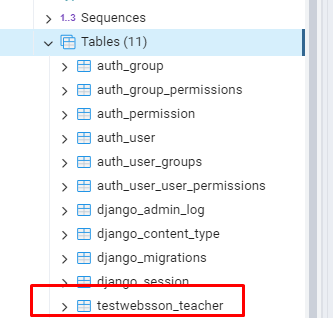
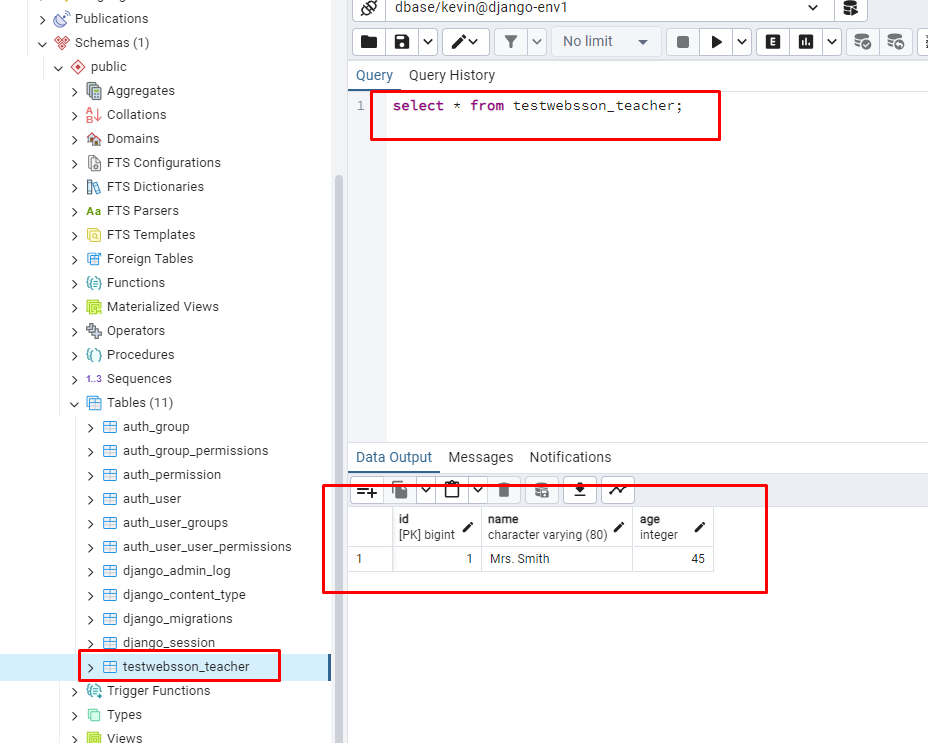
Furthermore we can see the testwebsson_teacher table was created as well:
With the Django admin app we can add some sample data to our table now easily. All we have to do is register the model with the admin app, startup Django again and login to the Django admin interface to insert some data:
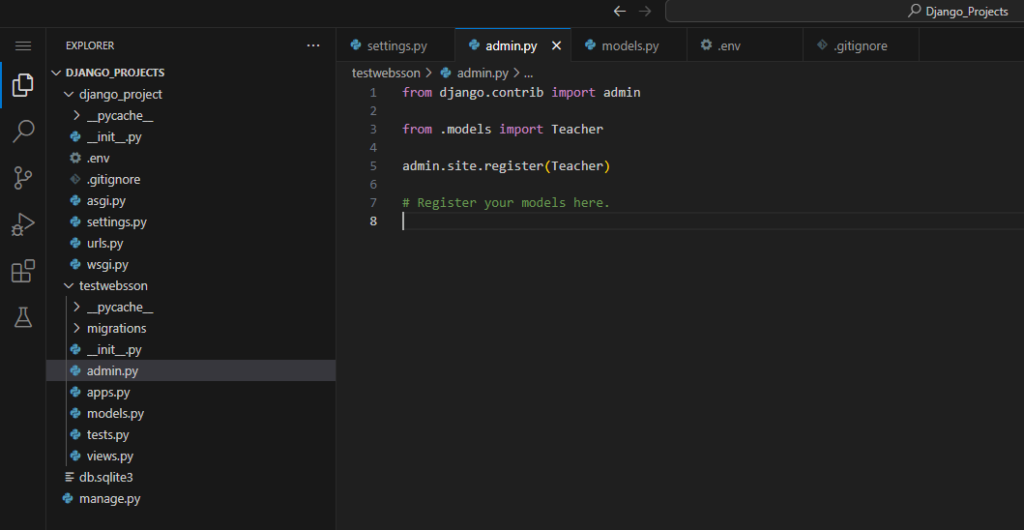
When you open the “admin.py” file from the “testwebsson” app, please add the following lines to register the model with admin app:
from .models import Teacher

admin.site.register(Teacher)
Afterwards we should start up Django again in the terminal. To do so run:
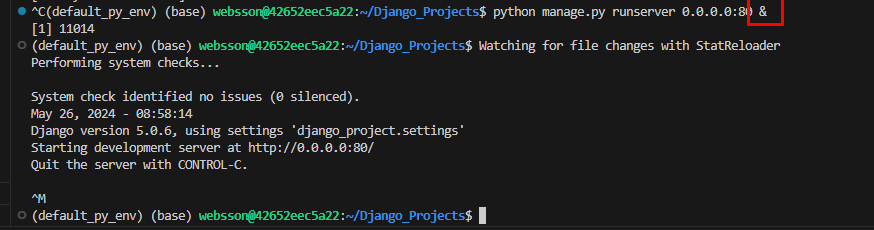
python manage.py runserver 0.0.0.0:80 &
Check if Django is running by opening the link to the Django web URL:
If all looks good add to your url “/admin” in order to get to the Django admin menu:
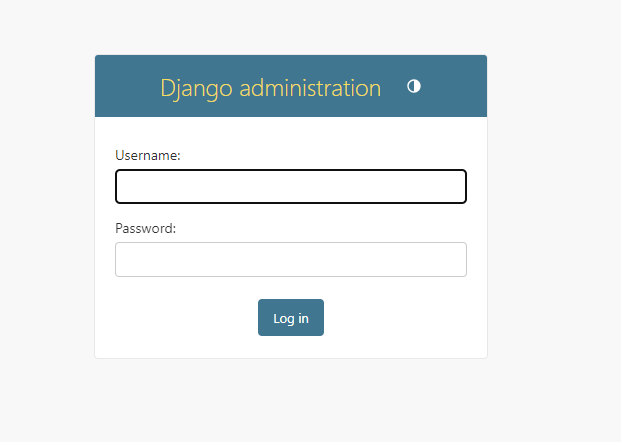
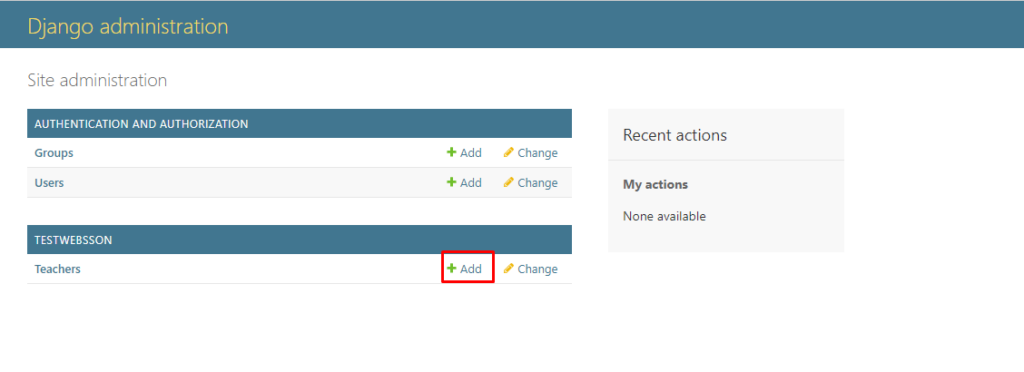
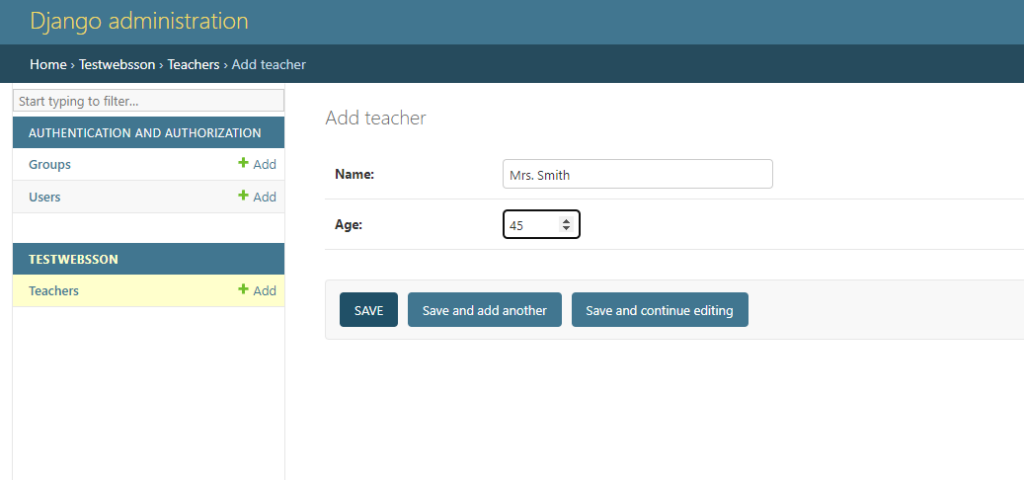
Enter your username and password set in the earlier steps. Now you should be able to see the Teacher table and be able to insert now records into it:
Now that you have added a record to the table with Django admin menu following the screenshots we can verify quickly that the record have been added using PGAdmin. Navigate to PGAdmin now and open the SQL editor and issue the following SQL command:
select * from testwebsson_teacher;
In the Django admin page you can of course also see the “Teachre object (1)” and when you click on it you can see and edit the entry there as well. Obviously you can make this entry more meaningful by displaying the name instead of “Teacher object”, but that you can be setup in the models.py following the Django documentation.
Finally as a best practice we will also create and save a .gitignore file as follows in VSCode so when you git push your code later you dont push any secrets:
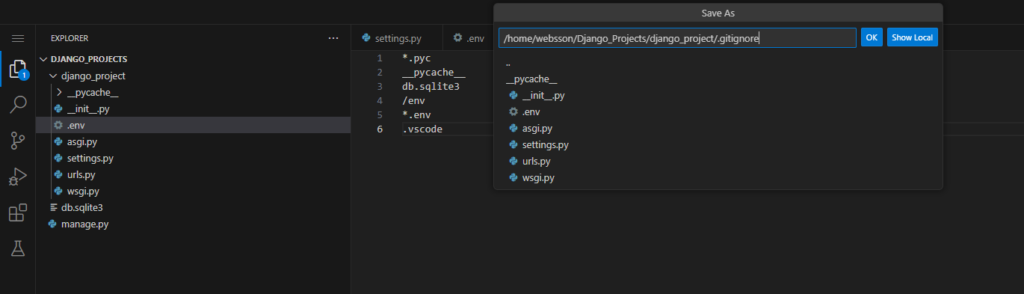
In the Django project directory create a .gitignore file with the following contents:
*.pyc
__pycache__
db.sqlite3
/env
*.env
.vscode
Now save it.
Although thee is plenty more features and to discover with Websson this concludes the
Part 1 series of how to get started with Django.
The second part will focus on installing the Django Rest Framework on React and Vue.JS in the same Django workspace.