Getting Started with Py4Web (Part 1)
In this tutorial we will quickly setup a cloud development workspace for Python and the Py4Web web framework inlcuding a MySQL database, a Visual Studio Code web IDE and PHPMyAdmin database admin panel.
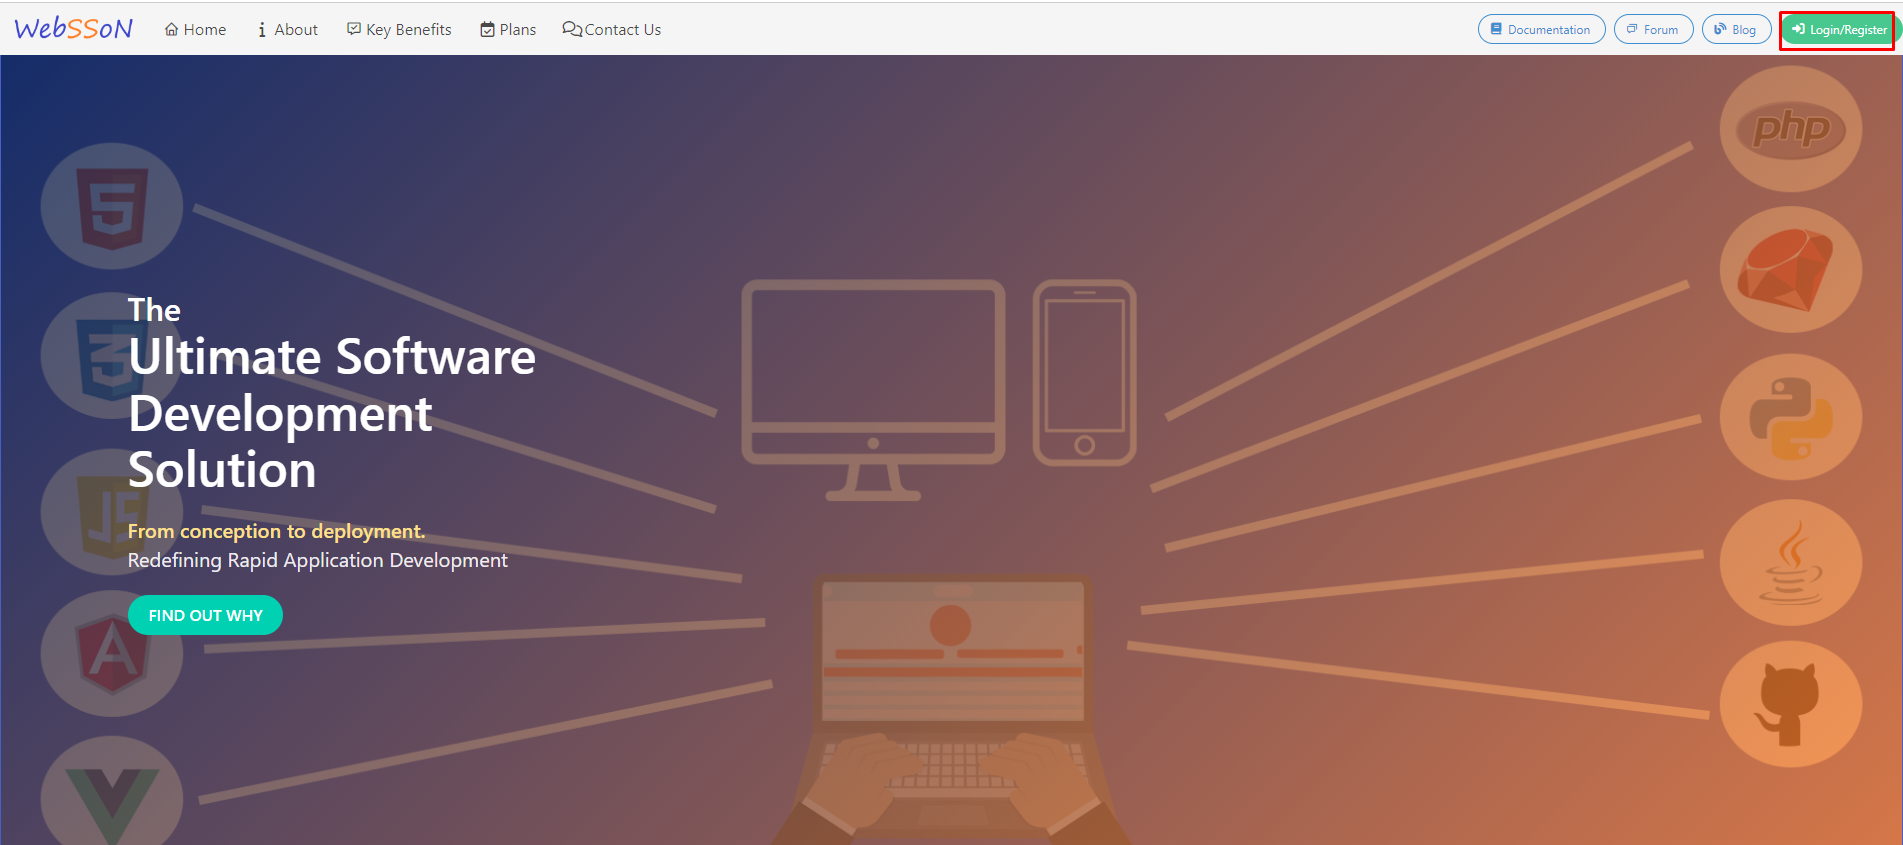
You will need to head over the Websson home page and if you don’t have a Websson account and free 30 day trial or other subscription yet, you will need to sign-up for an account and create a free trial or subscription.
Creating a free trial is easy. Click on the green Login/Register button on the top right corner.
Then click on register:

Pay special attention to entering a short, but meaningful username.
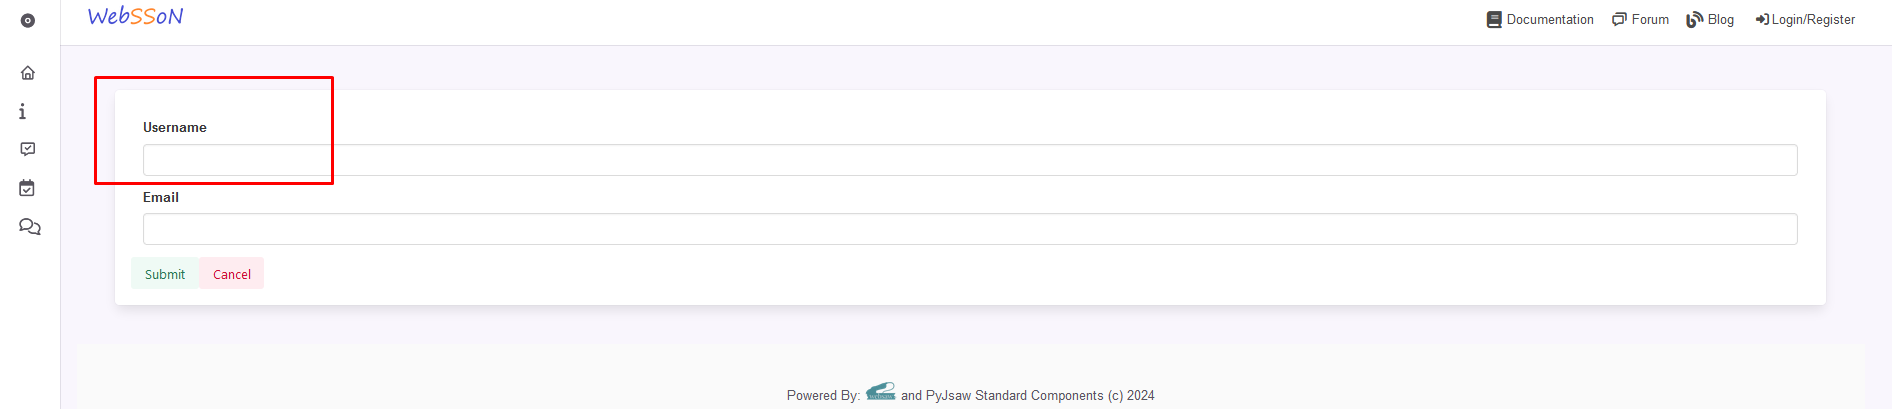
The username will be used to unique identify all of the resource that you will later use and deploy and will also be needed for you to login.
You email will be necessary to for general communication and to confirm that you really want to create this account.
After entering your preferred username and your email you will be asked to check you email and to confirm your account using the link in your email inbox.
After clicking on the link to confirm your email address, you will be redirected back to the Websson account creation page to finish your account creation.
You will be asked to enter your firstname, lastname and a password and confirm your password.
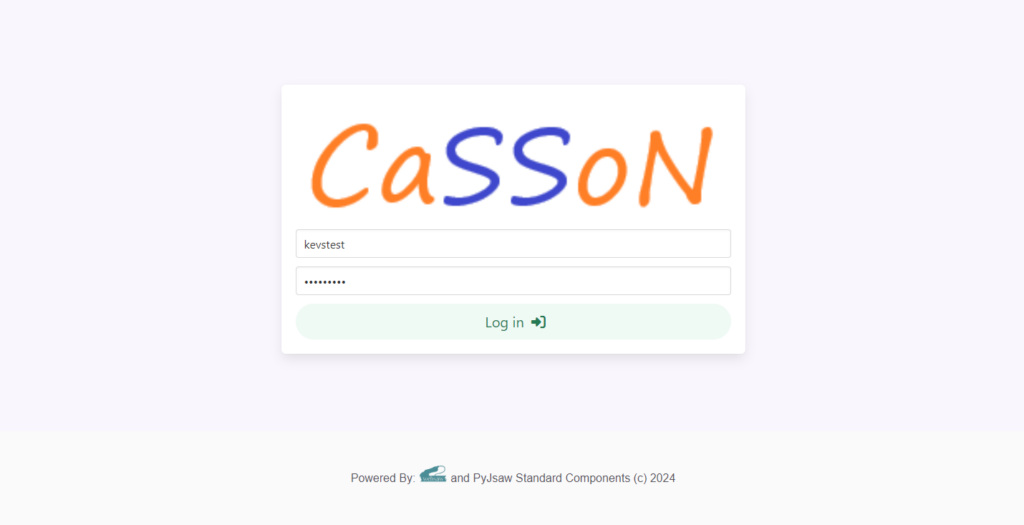
Finally you will be redirected to the login page so you can login with your Websson account.
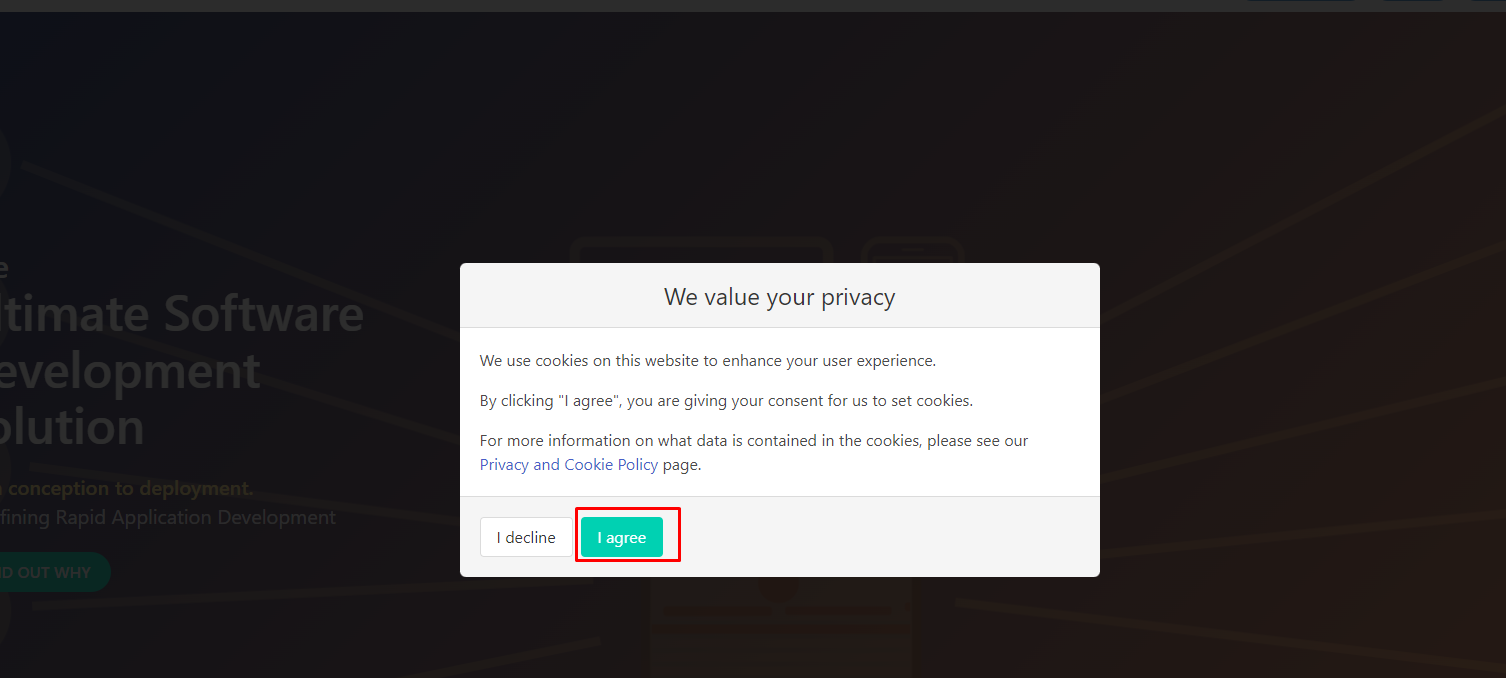
After login, if you have not been asked before, you will be asked to confirm that you agree with Websson’s cookie policy. Please only use the Websson service if you agree with the cookie policy.
After login the web page will not look much different other than that you now have registered as a user and you will see that you are logged in the upper right corner of the screen.
Websson has different user types, regular users, which you become after sign-up and customers.
Regular users can use Websson to collaborate on code with Websson customers, but more on that later.
In order for you to be able to create your own Py4Web cloud development workspace you need to be a customer and a subscription.
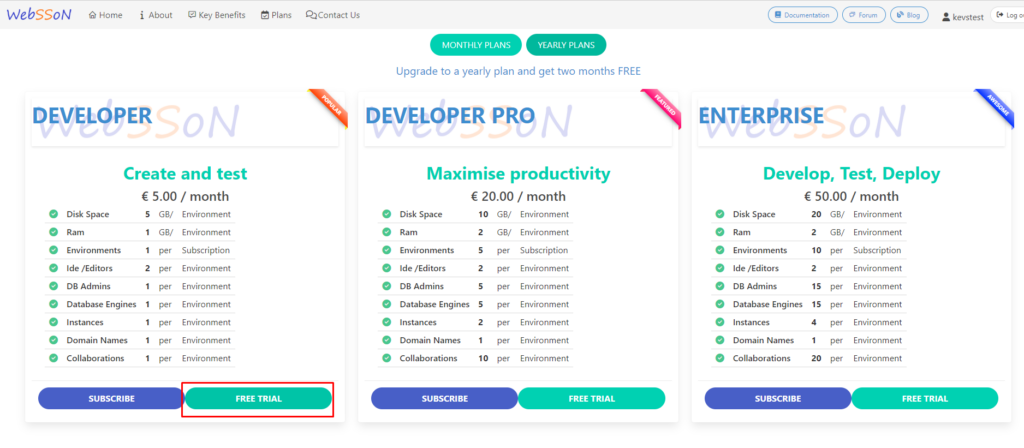
If you don’t have a subscription or free trial already navigate down the page to create a subscription or free trial:
Afterwards confirm you subsription:
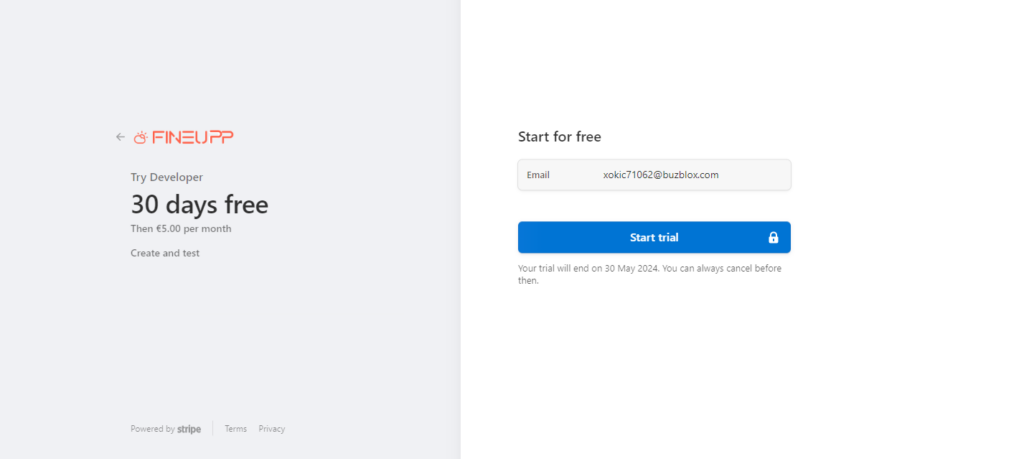
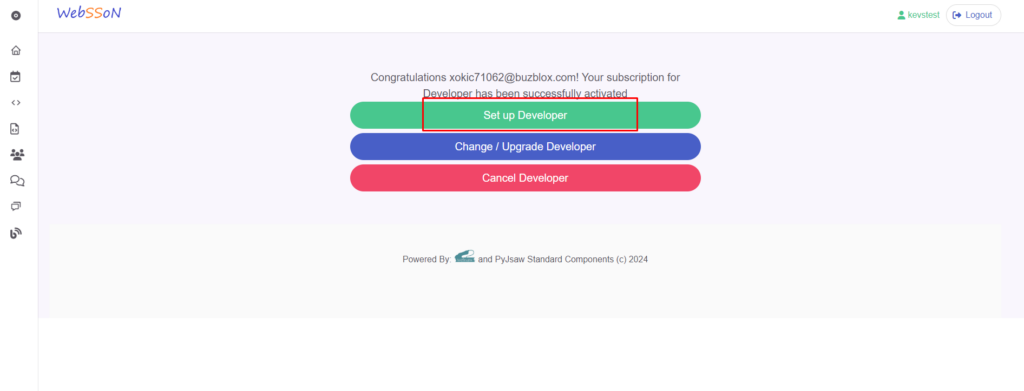
After you click on “Start trial” you will see the blue button will turn into a green button with a checkmark and then redirect you to the Websson portal where you can setup your Py4Web envrionment.
Click on setup for your subscription:
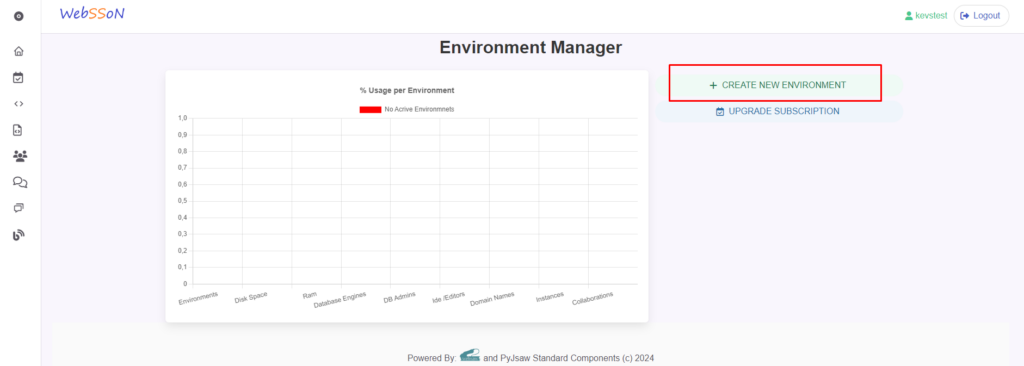
This will redirect you to the main portal where you can create or modify resources in your workspace.
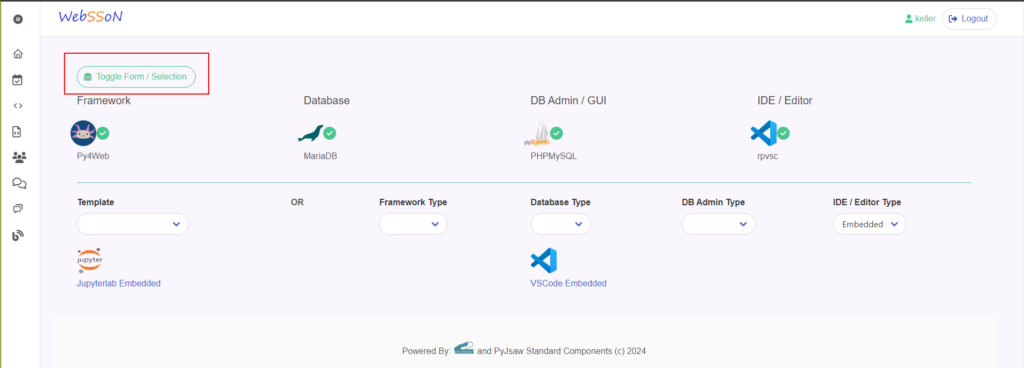
Let’s create a Py4Web environment here:
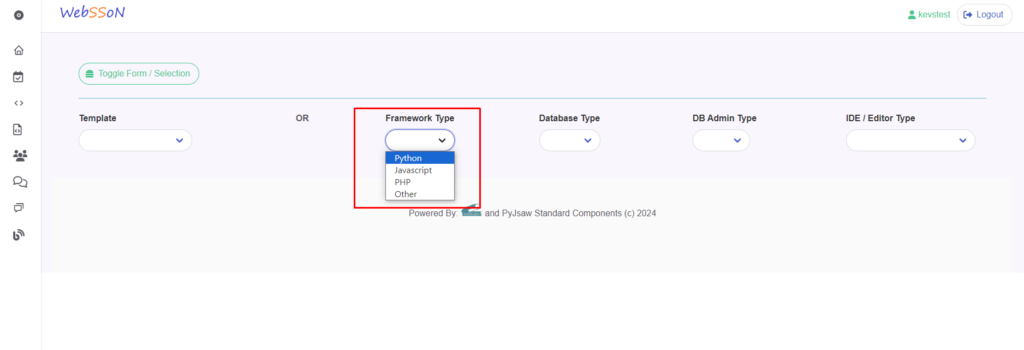
Then click on the drop down menu for web frameworks and choose the Python type:
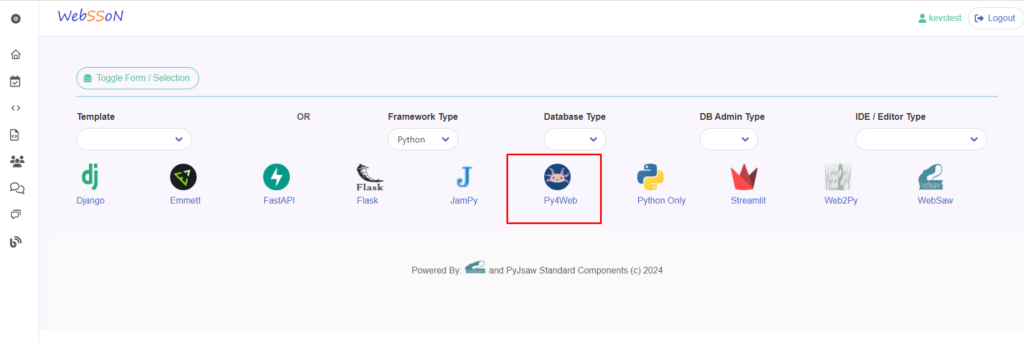
Then pick Py4Web:
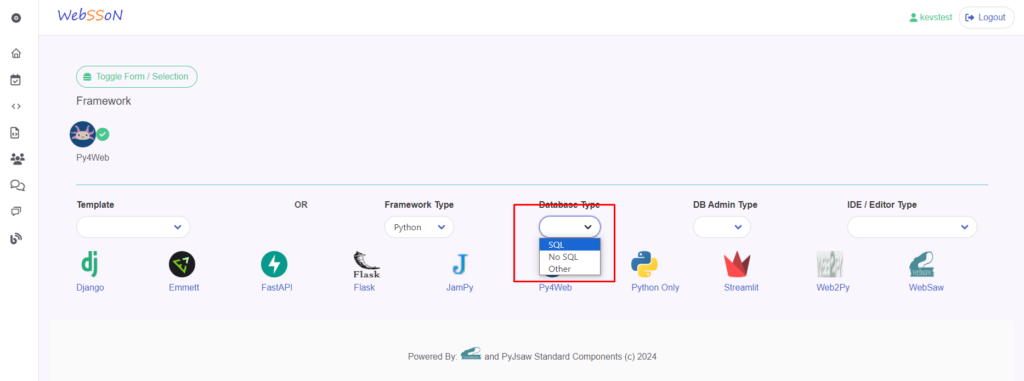
Afterwards pick a SQL database type:
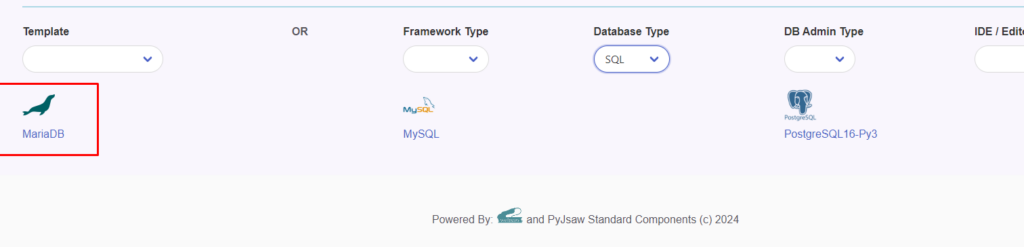
For this example let’s pick MariaDB database type:
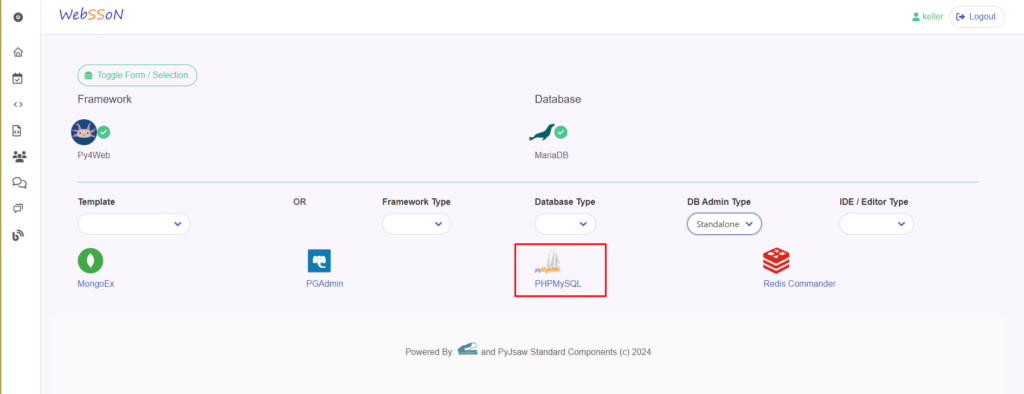
Now let’s pick the database admin panel softwar for the database, let’s pick "standalone" and afterwards..
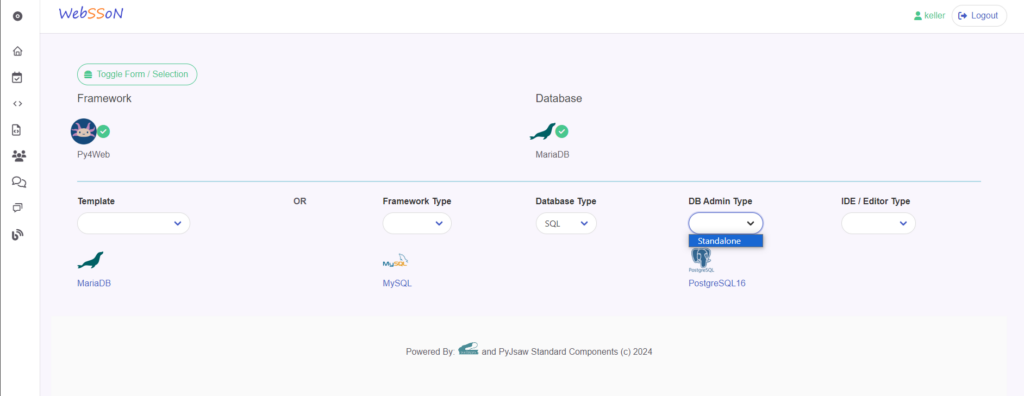
…in this case "PHPMyAdmin" :
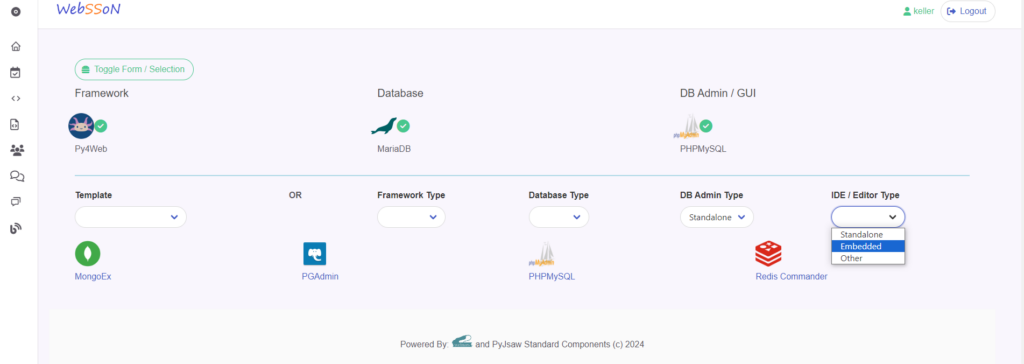
Afterwards we can pick the web integrated development environment we want to use for editing the Py4Web code base.
There are IDEs of the type "standalone" and "embedded" .
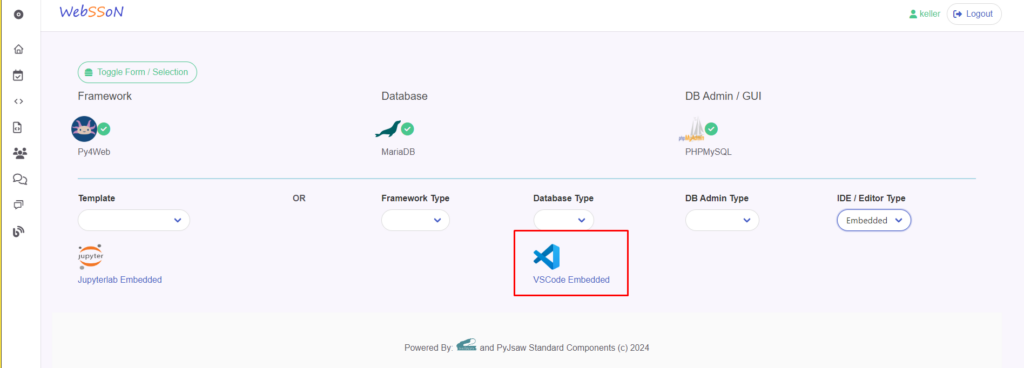
Let’s pick the "embedded" and VSCode type.
The "standalone" IDE (integrated development environment) type creates environments which are standalone web environments that mount the code base from the Py4Web environment, much like a sidecar.
The standalone IDE type will be intersting for a later stage when collaborating and code sharing will be discussed as you can also have multiple of this. This type does not have access to the Python interpreter in the main environment.
Generally it is recommended to use the "embedded" IDE type which runs in the same environment as your codebase which makes it possible to drop to a web terminal or install additional packages and libraries easy in the same environment as your Python interpreter, virtual environments and code reside right there. Especially if you are the only or main developer.
This type can only be deployed once
(of each type e.g. VSCode + Jupyter, but not two times VSCode for example).
Now that we completed our choices, lets finalize the deployment.
In order to that click on "Toggle Form / Selection" :
Give your workspace setup a short meaningful name and pick the hosting location. Today Websson only offers "Falkenstein/Germany" so let’s pick that.
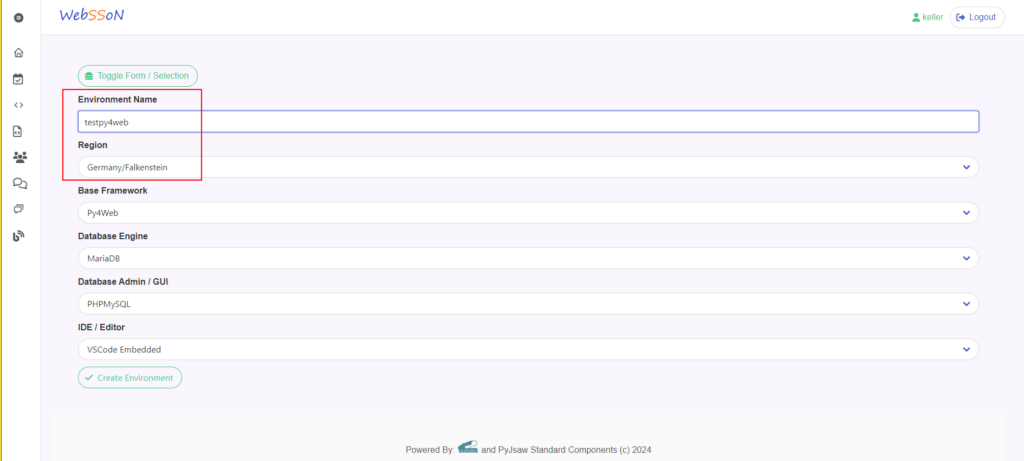
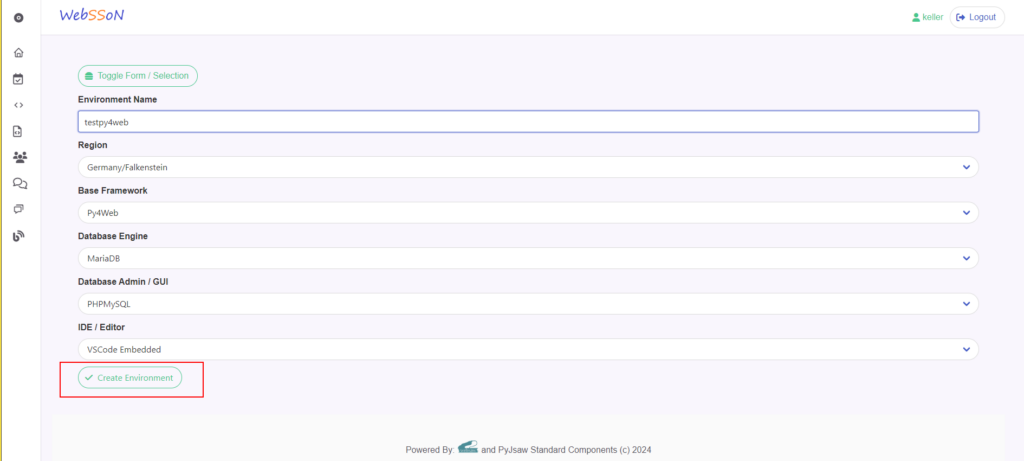
Now that we made all relevant choices you can create the development environment by clicking "Create environment" :
The first step of the environment creation process for Py4Web is to choose an Py4Web administrator password and optionally the default home page.
We don’t have a default Py4Web app yet that we want to route to as a index / home page for the URL that you Py4Web environment will be reachable on, so we can leave this blank.
Make sure you create an admin password (and take a note of it somewhere) so you can access the Py4Web admin dashboard later:
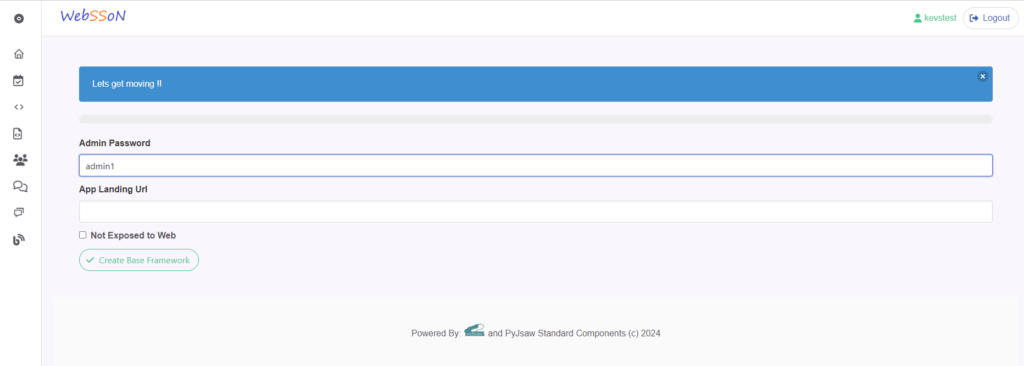
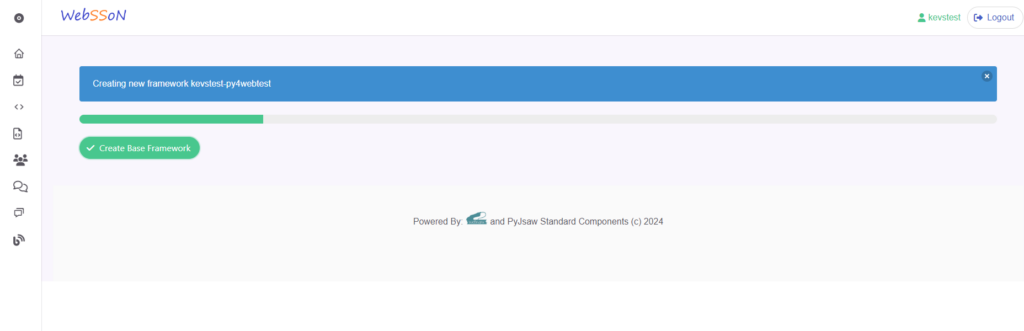
Now click on "Create Base Framework" .
You will now see that the Py4Web web framework will be deployed for you with a progress bar:
Once that step is done you will be asked to provide the MariaDB root password and default database name. You will also be asked to provide a password for a default MariaDB user.
Please enter a root password for the MariaDB root user, regular username + password and default database to be created at this step.
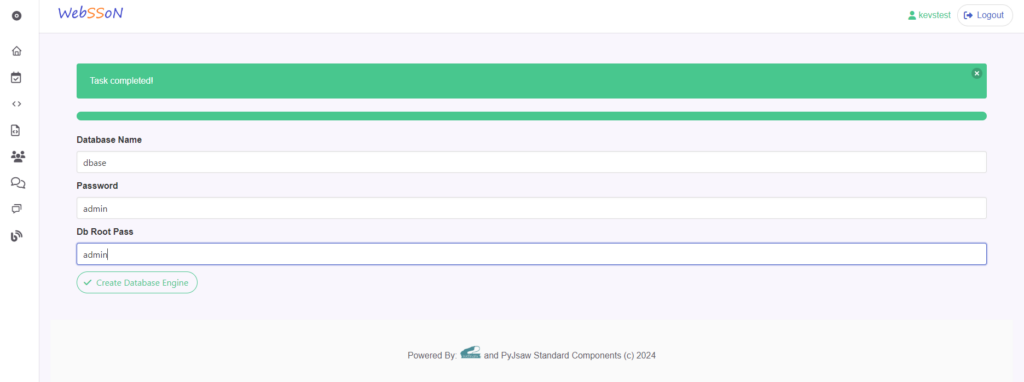
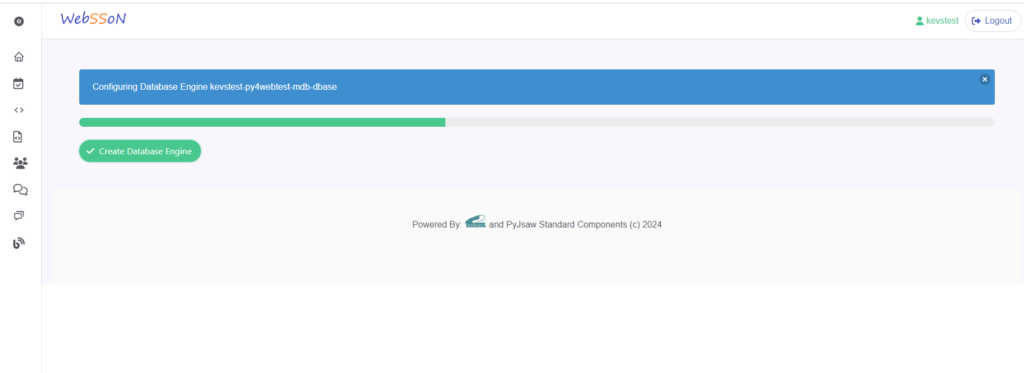
Now click on "Create Database Engine" .
You will see the following progress bar deploying the datbase:
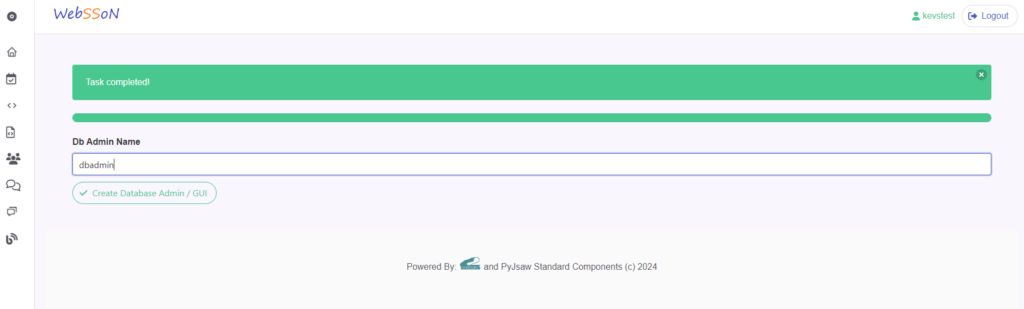
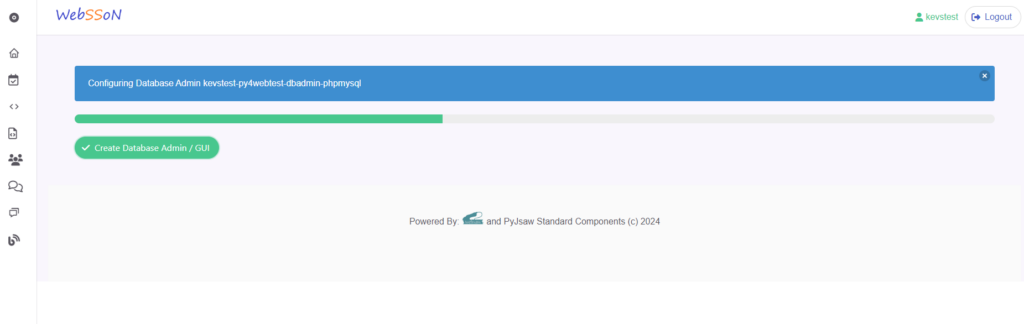
After the deployment of the database finishes you can give the PHPMyAdmin instance a name of your choice in the next deployment step:
Now you will see the progress bar moving while deploying the PHPMyAdmin environment for your database administration:
The last step is to give a name to your VSCode web IDE:
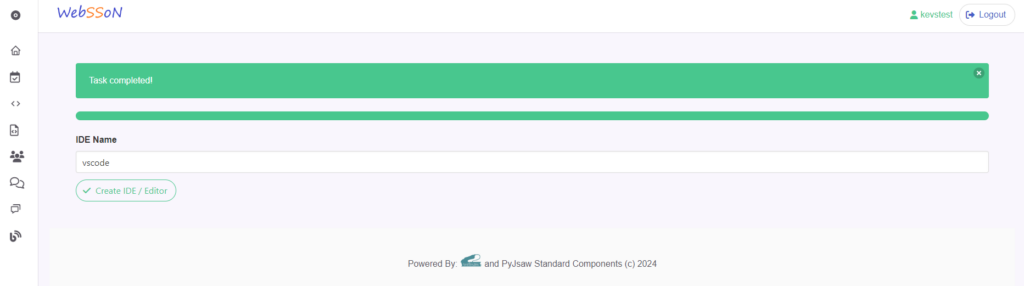
And have it deployed after you click on "Create IDE / Editor" :
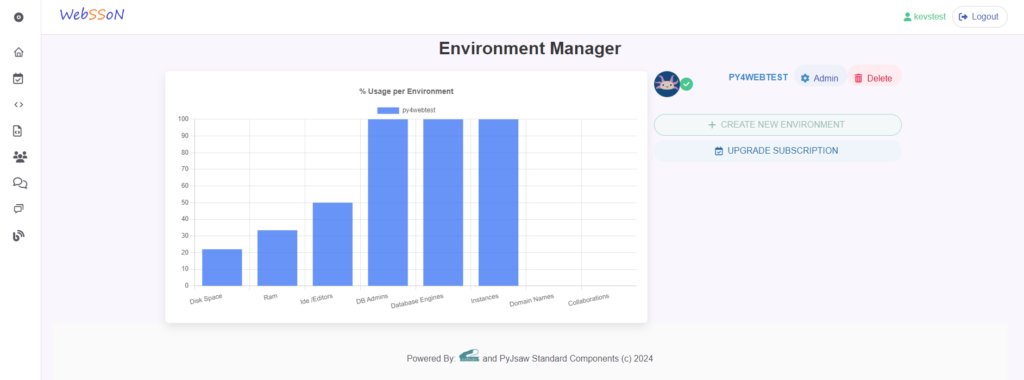
After the deployment is finished you will be redirected to the main portal page to administrate and use your fresh new cloud coding workspace.
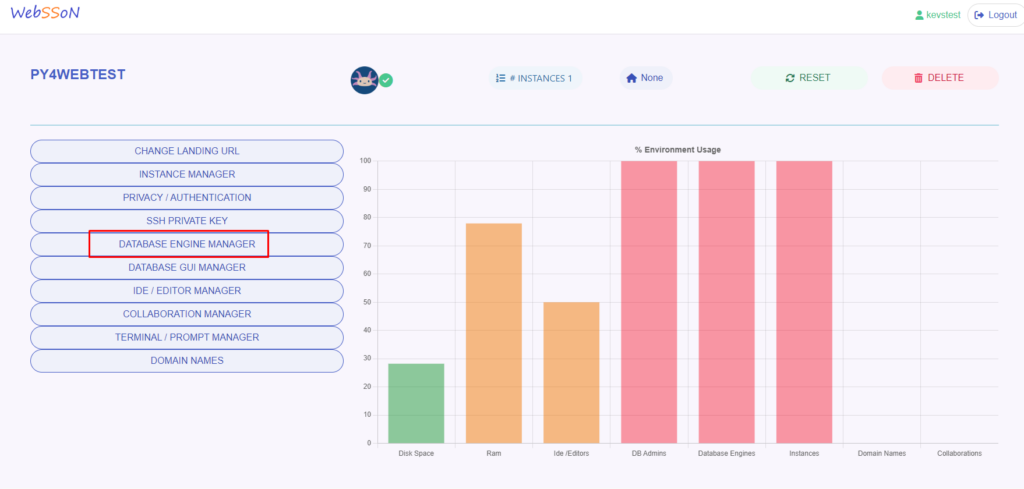
You can also see what resources you have currently deployed and how much resources you have used up:
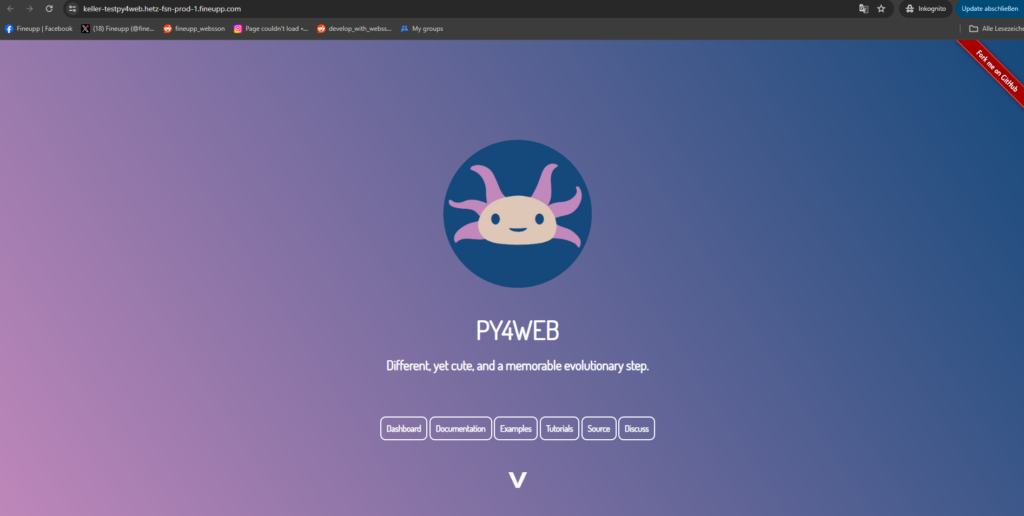
When you click on the Py4Web logo you will be redirected to your deployed Py4Web web page:

Now you should see this:
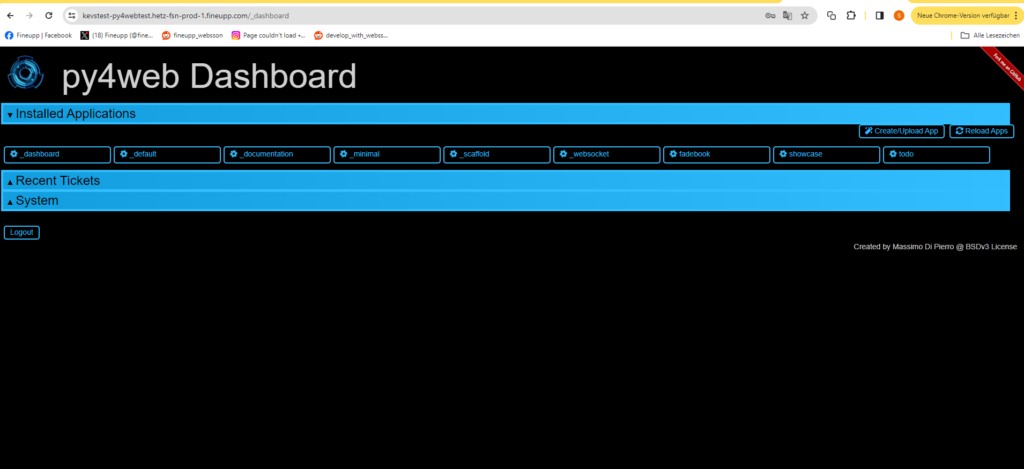
When you click on the Py4Web dashboard and enter the admin password you have setup at the beginning of the deplyoment process you will be able to login to the familiar web ide provided by Py4Web:
Now if you want to use the more sophisticated VSCode web ide that Websson has deployed for you, please navigate back to the Websson admin page and click on “admin”:
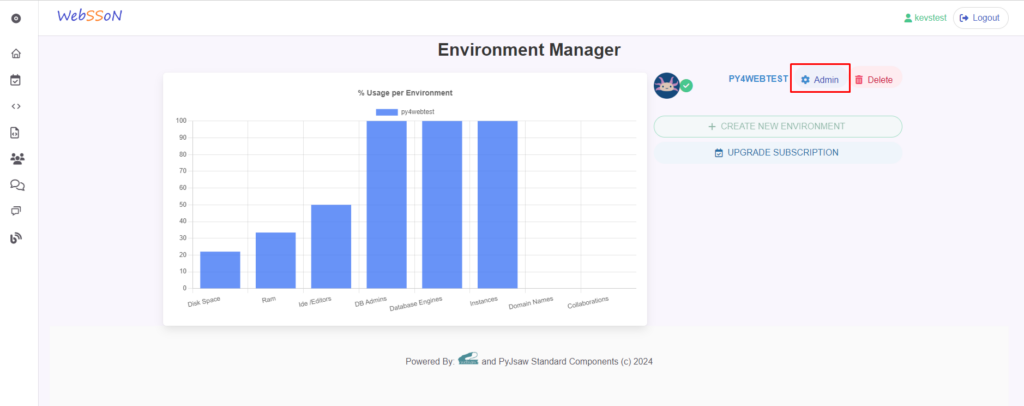
In the admin menu you can now see a lot of features that Websson provides to make developing in the Cloud easy, but we will get to each feature later.
You can also of course see what features of your subscription you have used up.
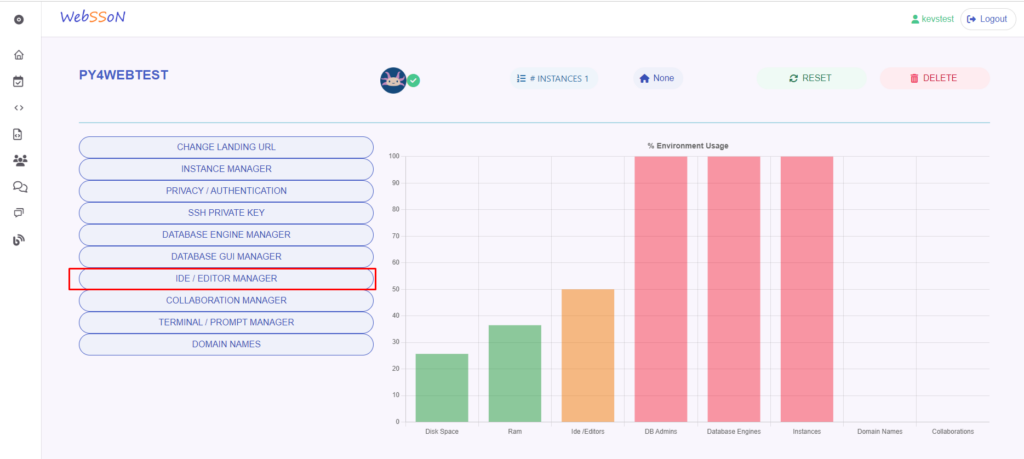
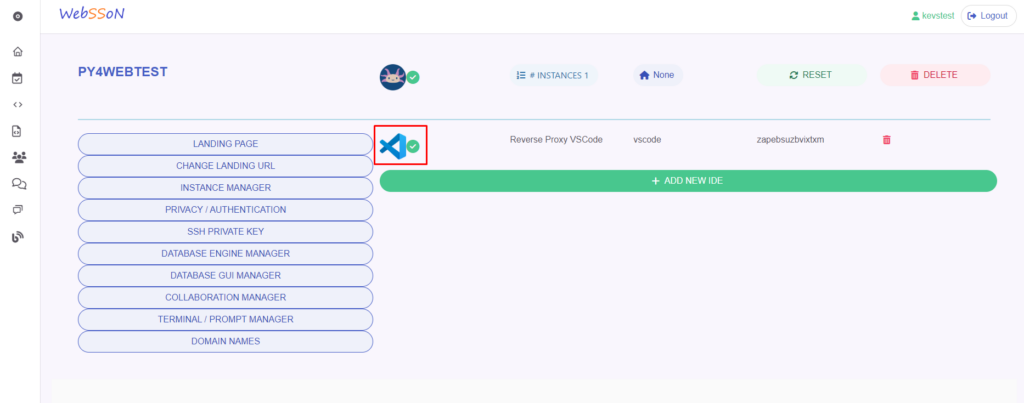
In order to use the VSCode web ide go to the "IDE / Editor" menu item:
Here you can click on the VSCode icon which will redirect you to your VSCode Py4Web workspace.
Don’t worry, the link is secured with a unique token which is used in the link. The token can also be viewed in the menu:
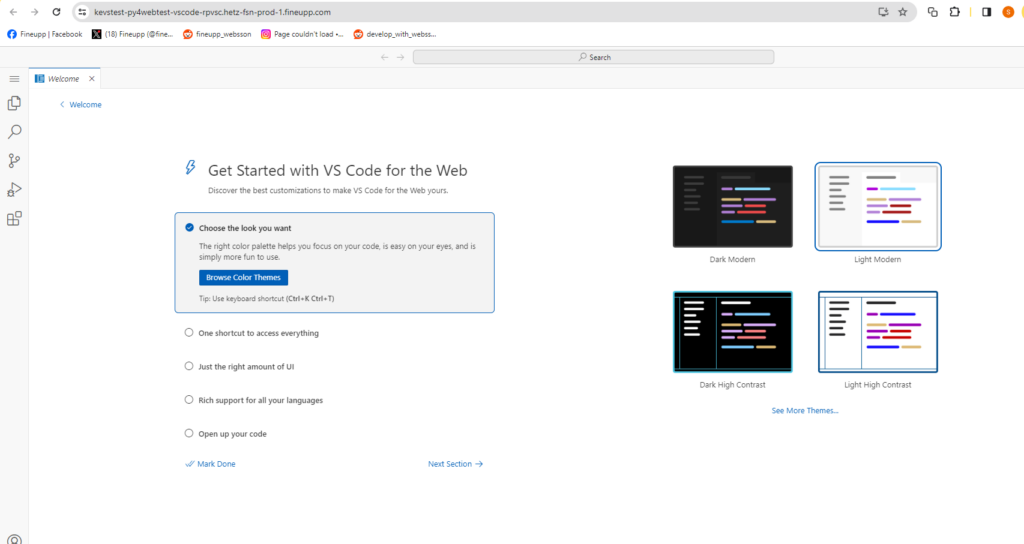
Now you can see your VSCode web environment loading and pick a color theme.
I prefer black so I will use that in the screenshots going forward.
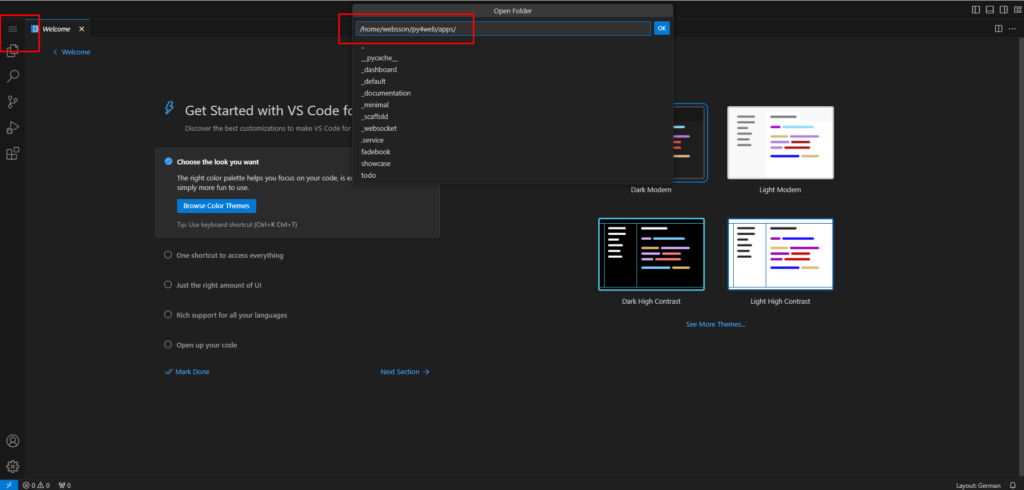
In order to edit Py4Web code, click on the upper left corner, the "File" menu and click on "Open folder" then open the folder path "/home/websson/py4web/apps":
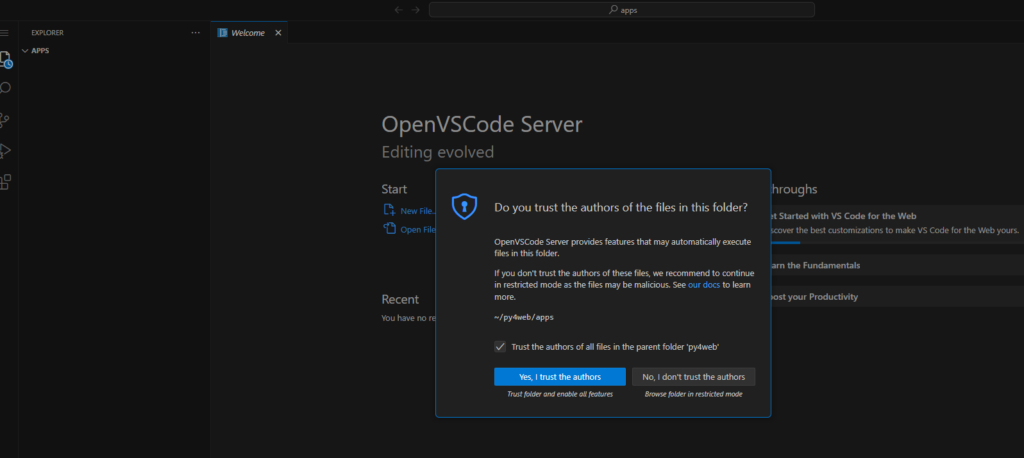
VSCode will ask you if you trust the code authors, please click on "I trust them" and set the appropiate checkmark:
Now you will see the file paths and files that you can edit on the left hand side.
Open the folder of the Py4Web provided sample app “todo” and the index.html template.
Then just to get familiar with the editing process, change the template a bit and save the changes by using the STRG+S hotkeys or go to the File menu and click on save.
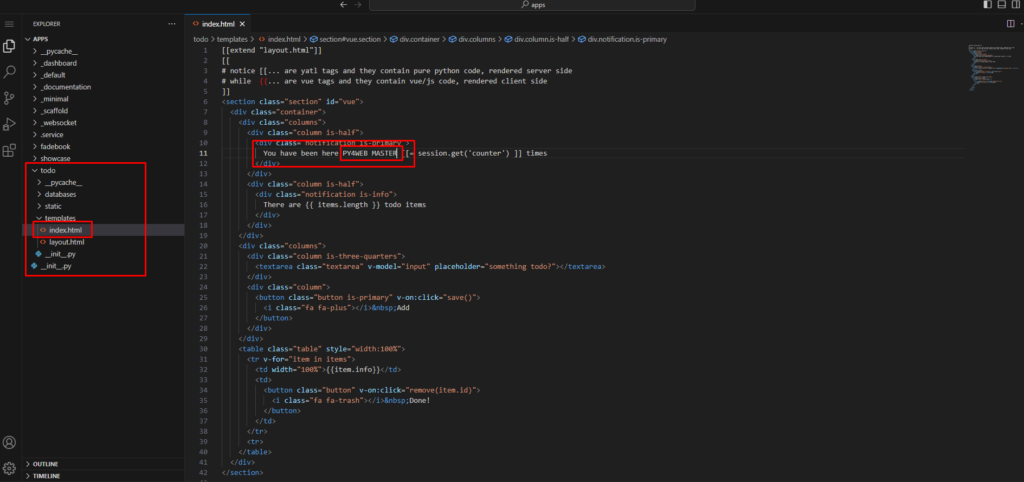
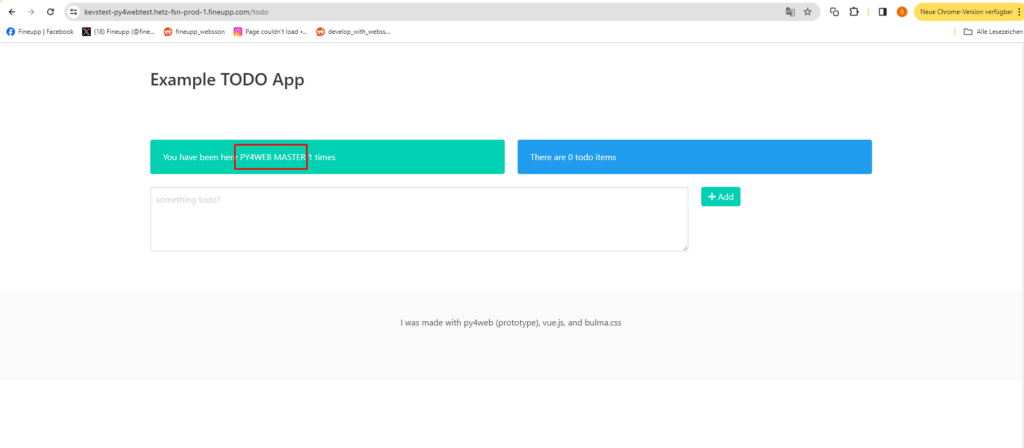
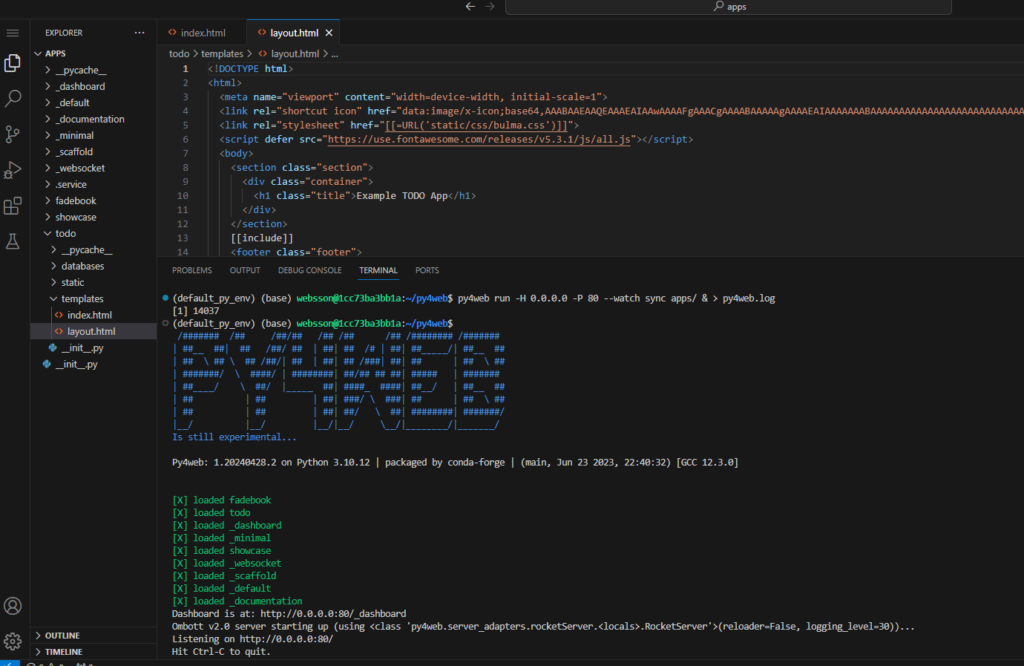
Now you can navigate to the Py4Web standard todo app (*YOUR-PY4WEB-URL*/todo) and see your changes being instantly applied:
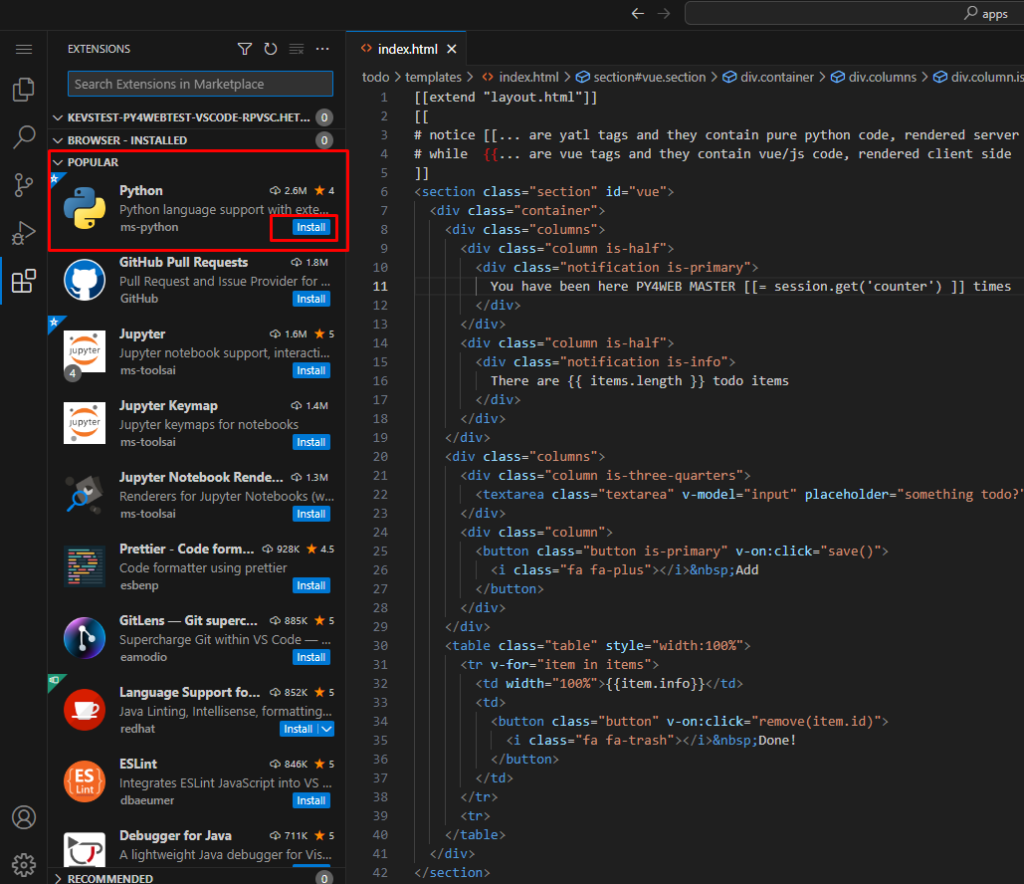
Next let’s install the Python VSCode extension to be able to use debugging and other features of the VSCode IDE with Python:
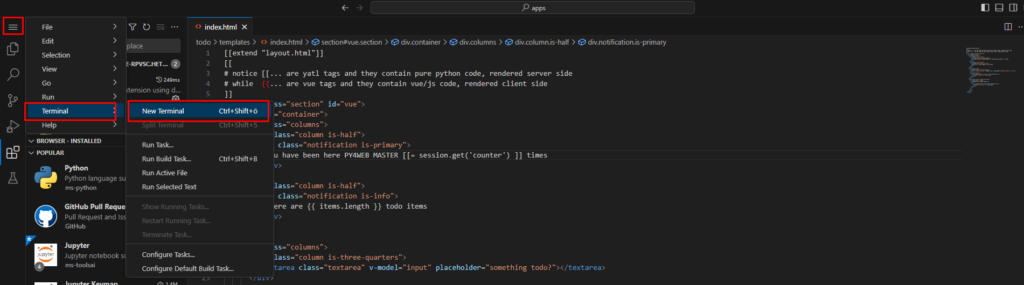
Afterwards lets’s get familiar how to open a web terminal by going back to the upper left corner menu and navigate to "Terminal" and then "New Terminal" :
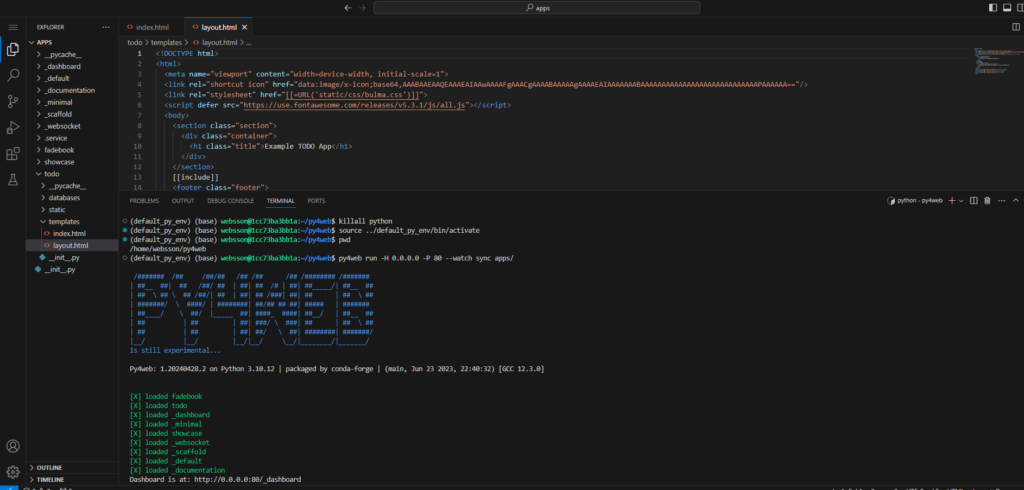
While the Py4Web environment features autostart and auto-refresh upon code changes, it is often useful during debugging to see the full terminal output of the running Py4Web shell.
In order to do that, we need to kill the Py4Web process that was started automatically and start Py4Web again from the shell manually:
To kill the current Py4Web instance run:
killall python
Make sure you cd into /home/websson/py4web.
Then activate the default Websson Python virtual environment "default_py_env" by executing:
source ../default_py_env/bin/activate
Now with environment activated and in the path of
/home/websson/py4web
you can run Py4Web with the following command:
py4web run -H 0.0.0.0 -P 80 --watch sync apps/
If you want to run Py4Web as background process at the “&” at the end as usual, otherwise Py4Web will now terminate as your web terminal session ends.
py4web run -H 0.0.0.0 -P 80 --watch sync apps/ &
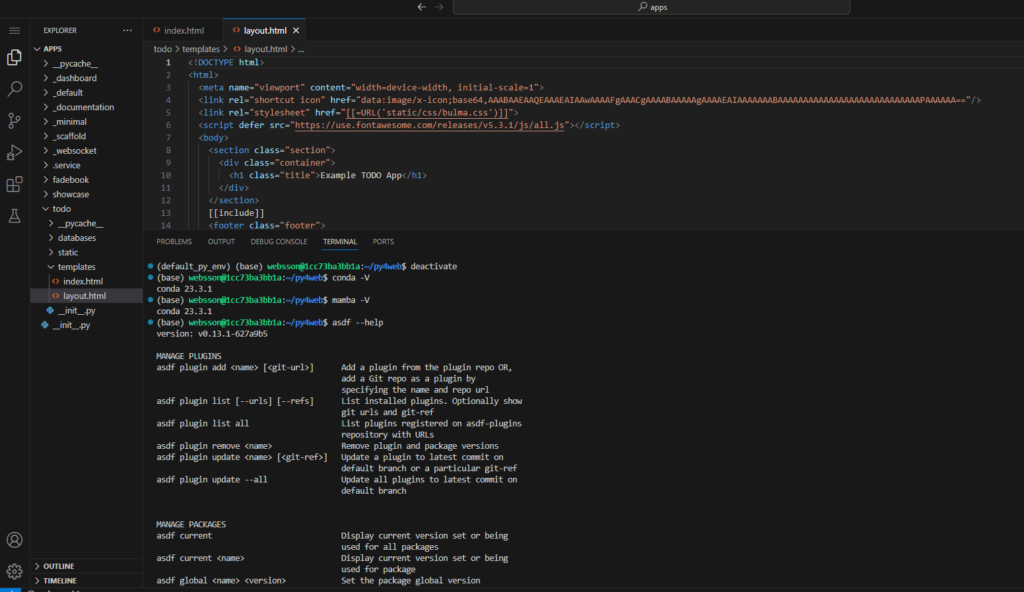
Now you can also see how to add Python packages via pip to the the standard virtual environment as usual.
Websson features a fully functional installation of Mamba which is an open source version of the Python Conda package manager with the packages of the open source / free Conda (Conda-Forge) channel activated by default.
This makes it easy for you to create new virtual environments via Python venv, Conda or any way you see fit to run Py4Web. Of course you can also install a PyPy interpreter this way. Try it out in the terminal:
conda -version
Futhermore Websson environments also feature the ASDF package manager, which lets you install furter programming languages or libraries into your Websson environment, such as Node.JS. Of course you can then also install Vue.JS, React or Angular etc. in the same environment and connect to Py4Web as an API.
With a simple
asdf plugin install node
you could add a version of Node.js to your environment as you see fit.
Using
python -m venv testenv
for example would install a further virtual Python environment in your Websson workspace that you can customize:

Now let’s switch gears and learn how we can connect to the MariaDB database that we deployed earlier with PHPMyadmin which we also deployed and use it with our Py4Web installation.
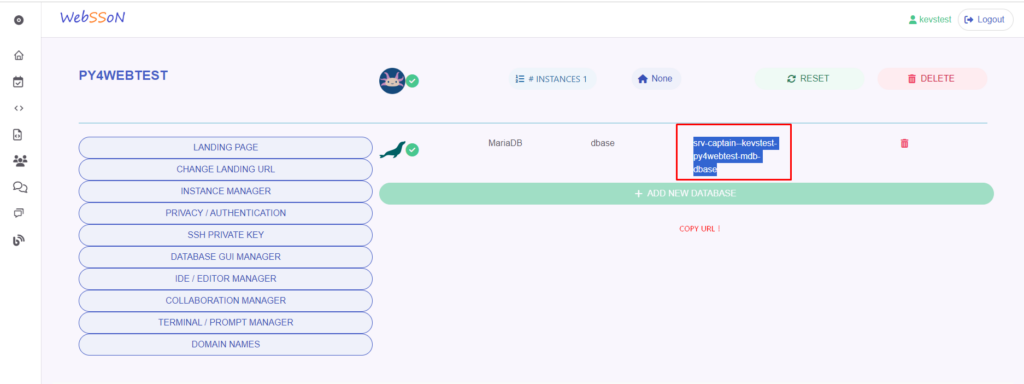
In order to get the local connection string to the MariaDB database which we need for PHPMyAdmin and for Py4Web, we need to navigate back to the Websson portal and go to "Database Engine Manager" .
Here we can see the connection string that only works for your local Websson environments.
Copy this connection string as we will need to paste it in the next steps.
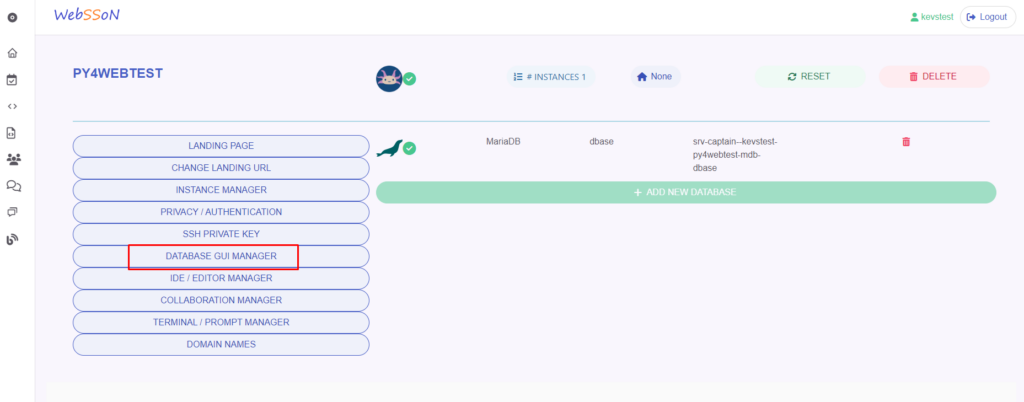
With the DB connection string copied into your clipboard navigate to the menu item "Database GUI Manager" :
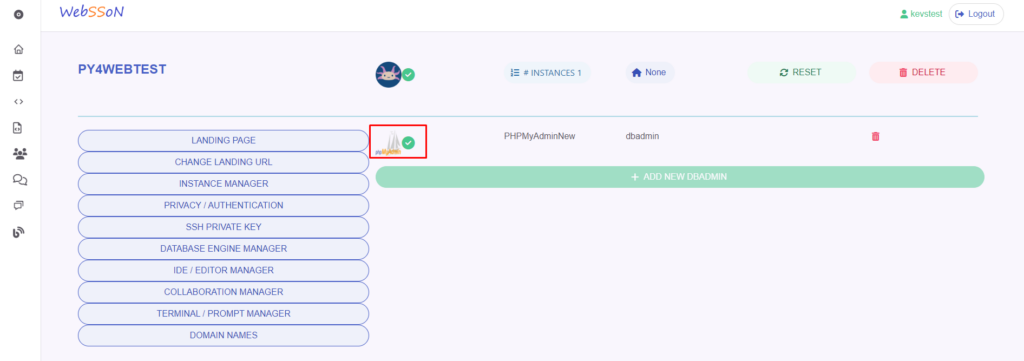
And then click on the PHPMyAdmin logo:
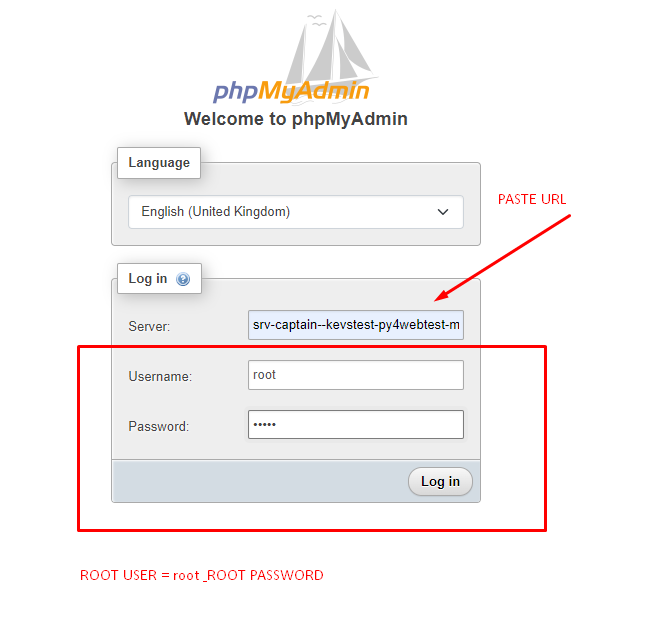
In the PHPMyAdmin login screen paste the connection URL, then enter "root" for the username and enter the password you set for the root user when you deployed the database:
You should now have connected to the MariaDB you deployed earlier with PHPMyAdmin:
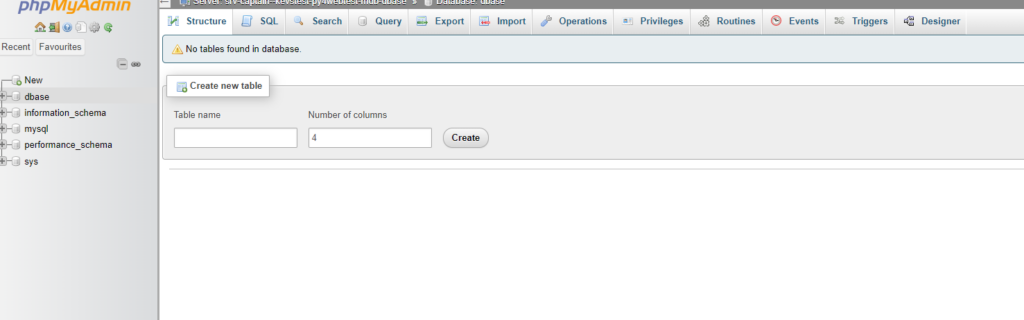
You can also see the database name of the database you told Websson to create during deployment, which is in this case "dbase".
Let’s connect Py4Web to this database.
Navigate back to the VSCode web ide where Py4Web is running and stop Py4Web using CTRL-C.
We can now re-run Py4Web as background task:
py4web run -H 0.0.0.0 -P 80 --watch sync apps/ &
Now CD into /home/websson/py4web/apps .
Here we will make a copy of the Py4Web scaffold app:
cp -r _scaffold testapp
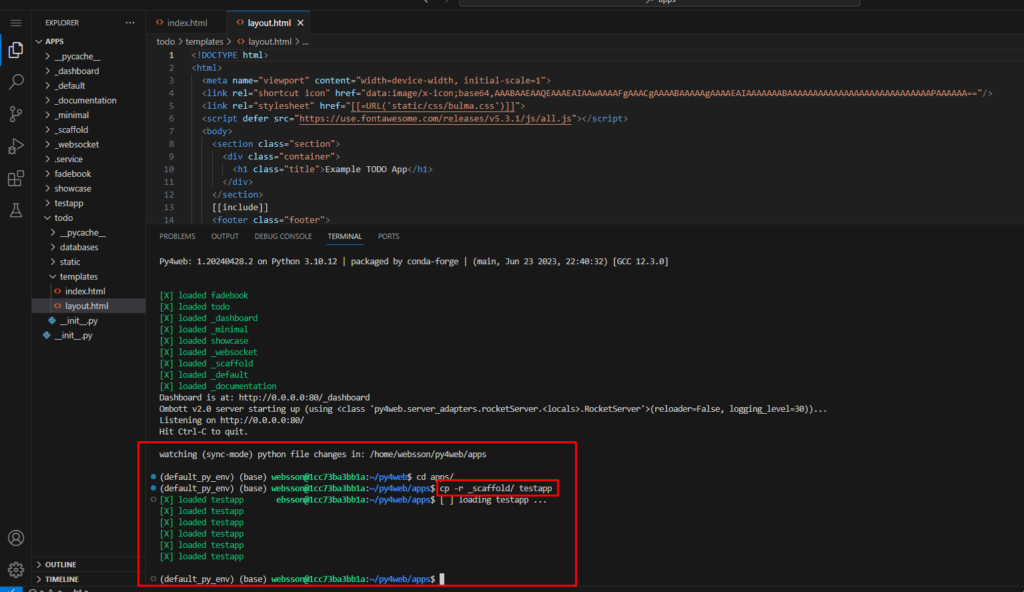
You can see Py4Web is automatically reloading and registering the new app.
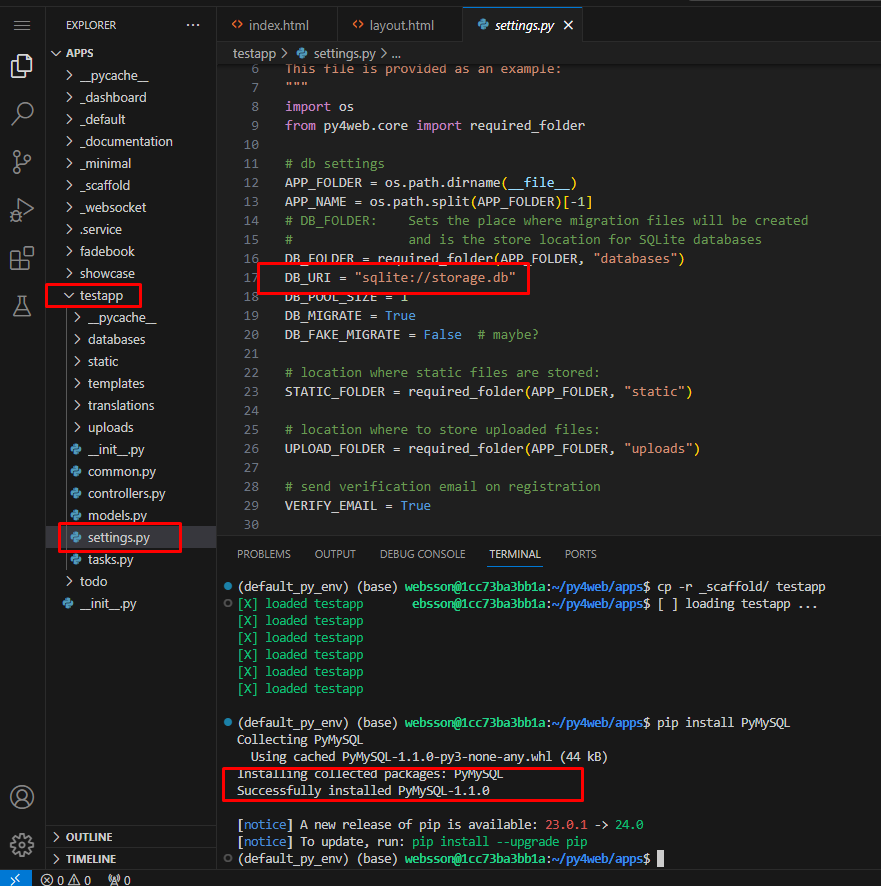
We can install the MariaDB driver now via:
pip install PyMySQL
You may also want to remove the database folder at this point from testapp.
Run
cd testapp
and then
rm -rf databases"
Finally run:
"mkdir databases"
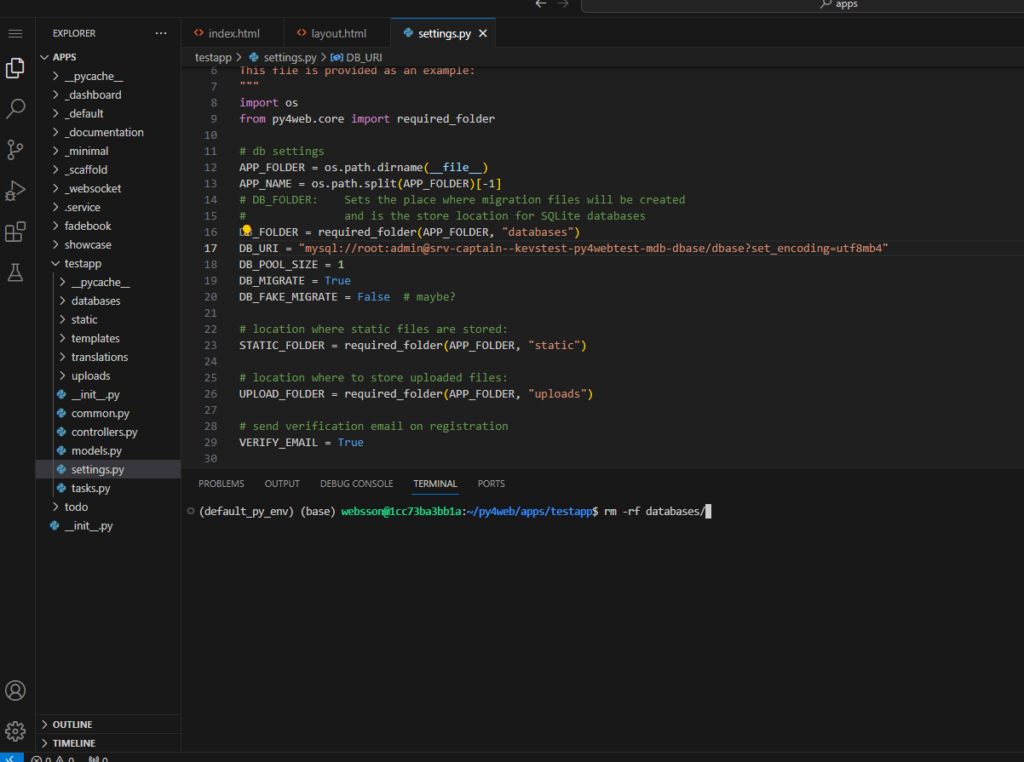
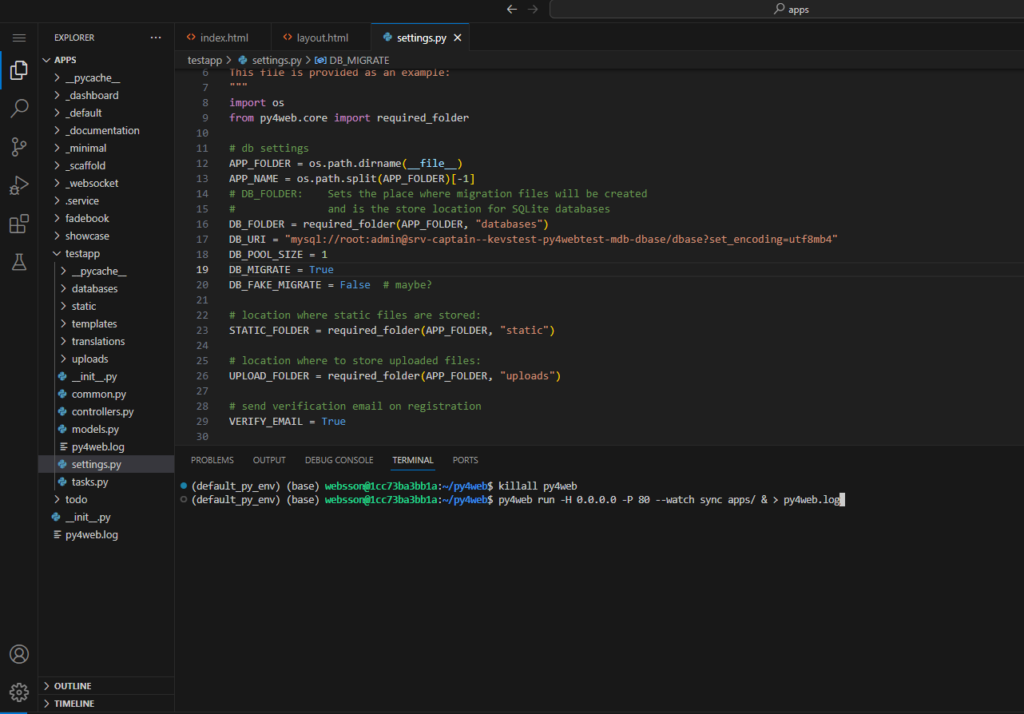
Back in VSCode please also open the “settings.py” file in the testapp folder and locate the line "DB_URI = "sqlite..."
Replace the line with the MariaDB connection string in order to connect to the MariaDB with the root user Copy and paste the connection URL for the database just like you did before when connecting with PHPMyAdmin. Re-use the database credentials for the root user. For example:
mysql://root:"PASSWORD"@"CONNECTIONURL"/"DATABASENAME"
Your connection string should be looking similiar to this:
mysql://root:XXXXX@srv-captain--kevstest-py4webtest-mdb-dbase/dbase?set_encoding=utf8mb4
The testapp should be ready to go now with all database migrations done.
If you get any errors, including database driver errors just re-start Py4Web manually and everything should be ok:
kilall py4web
then
py4web run -H 0.0.0.0 -P 80 --watch sync apps/ &
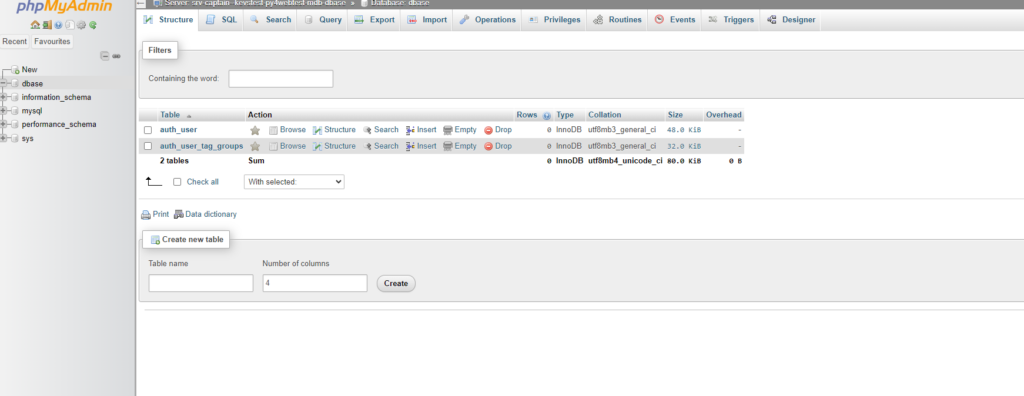
If you go to PHPMyAdmin now you will see that Py4Web created some tables automatically for user manager in the "dbase" database:
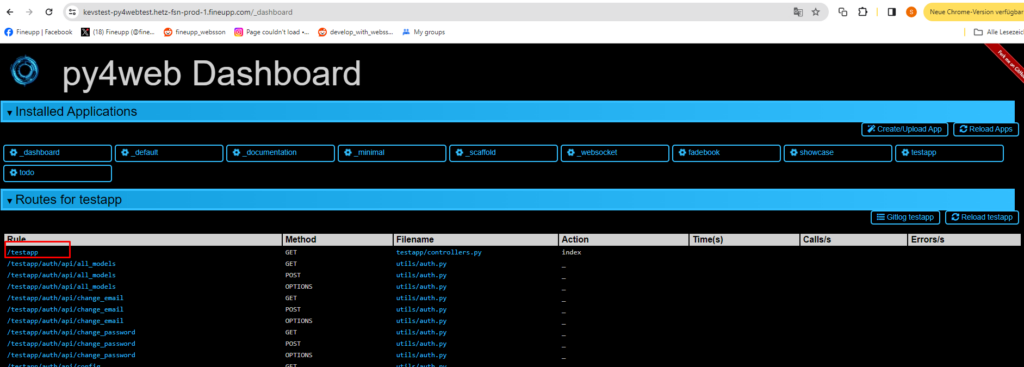
Go ahead and navigate back to the Py4Web page and check your dashboard for the "testapp" and click on the route/link to check out "testapp":
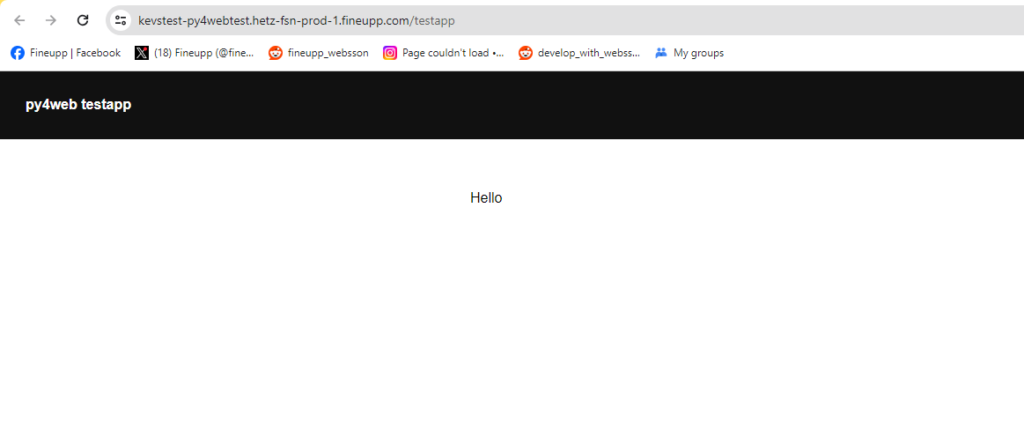
You should see the testapp now connected to MariaDB:
If you don’t like the VSCode web version and prefer to use the VSCode desktop app or another desktop based IDE that supports SSH connectivity you can also use an SSH tunnel to edit code.
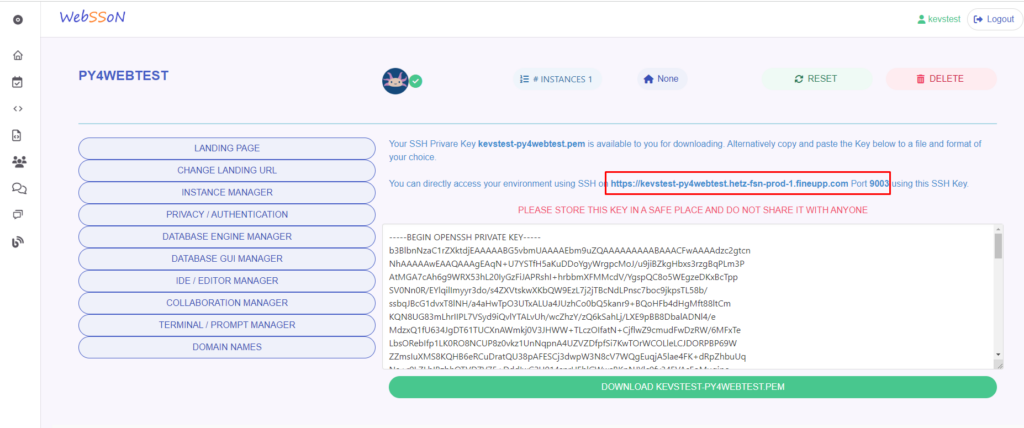
Navigate back to the Websson admin menu and click on "SSH Privat Key" to download the private SSH key, check the URL and port that you need to connect to your Py4Web environment via VSCode or PyCharm via SSH.
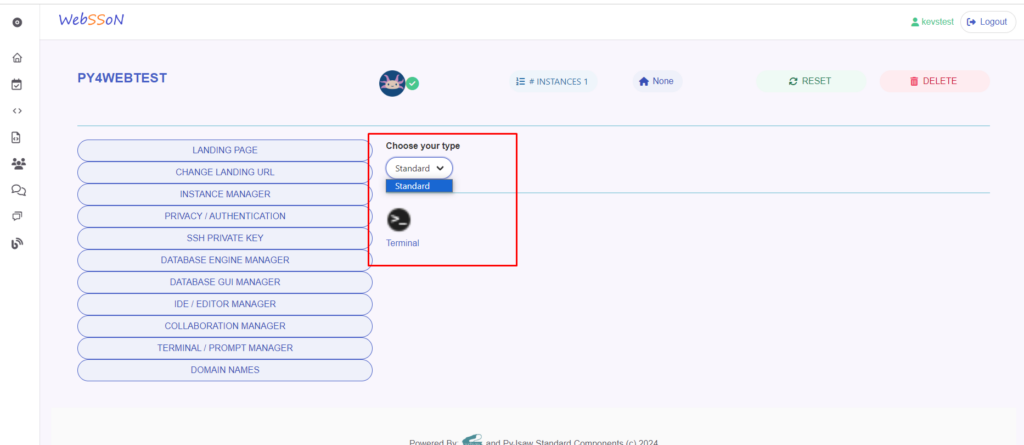
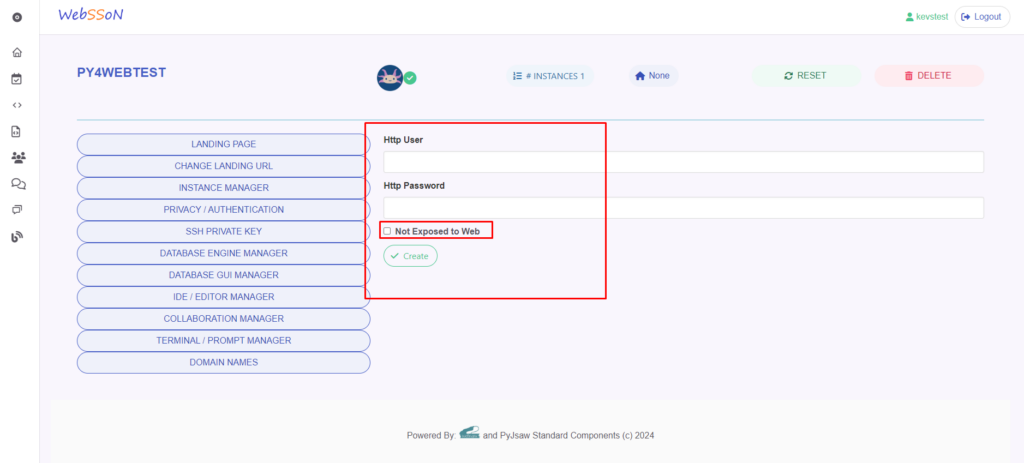
If you would like to create a web terminal with username and password without the need to create an IDE, you can also go the menu item "TERMINAL/ PROMPT MANAGER" and select the "Standard" type of terminal and choose a username and password and go ahead and create a web terminal.
If you wish to also safeguard your web page with an additional HTTP user/password authentication or take your web page offline for a while you can do that by going to "PRIVACY / AUTHENTICATION“.
With Websson you can also set a customer "landing page” so that when you share the URL of you Py4Web Websson hosted app users will be redirected to a specific Py4Web app or index page per default.
In order to set this up navigate to "LANDING PAGE" in the Websson menu and enter the name or relative path to the page Websson should redirect:

Furthermore Websson offers the ability to have the environment restarted, for that just click on the green "RESET" button in the upper right corner.

This concludes the fundamental functionalties to setup a Py4Web environment in Websson.
An additional post will describe more advanced features such as using a custom domain, increasing the number of web workers for scalability and how to use the safe code sharing and collaboration feature.